Translations
Staxel has been built to handle having multiple translations. It includes the ability to change all text being displayed with only a couple of exceptions to this rule. The following is a list of features you can change:
- Dialogue text. (i.e. Villager conversations)
- Menu text. (i.e. All menu's. Item/Block names and descriptions. In world Tags. etc)
- The font used. Japanese translation uses this to provide a better default font for Japanese characters.
- Other various instances of text.
With that however, there are a couple things Staxel cannot do. These include;
- Can't set a font for a specific set of characters.
- Staxel does not handle right to left text well. It can possible to fake it however but may require a lot of work.
- Gendering names or items. In most cases you either need to assume neutral (For cases such as the Player.) or as part of the statement. (For cases where an item will not change. Such as the Mug'o'sap in the Barkeep's dialogue.)
Editing the Official Staxel Translations
The Staxel team has chosen to have all of the translations publically avaliable for review and editing over at https://github.com/bartwe/StaxelTranslations. If you have knowledge of how to use git/github then the following tutorials will not be as necessary. In this case, you may still want to see #How to Check Translations Ingame and possibly #How to view the dialogue flow.
Editing a Single File on Github
This section is mainly for editing a single file on Github, although it can extend to editing multiple files quite easliy. (Though please don't do this method if you editing more than 5 files at once.)
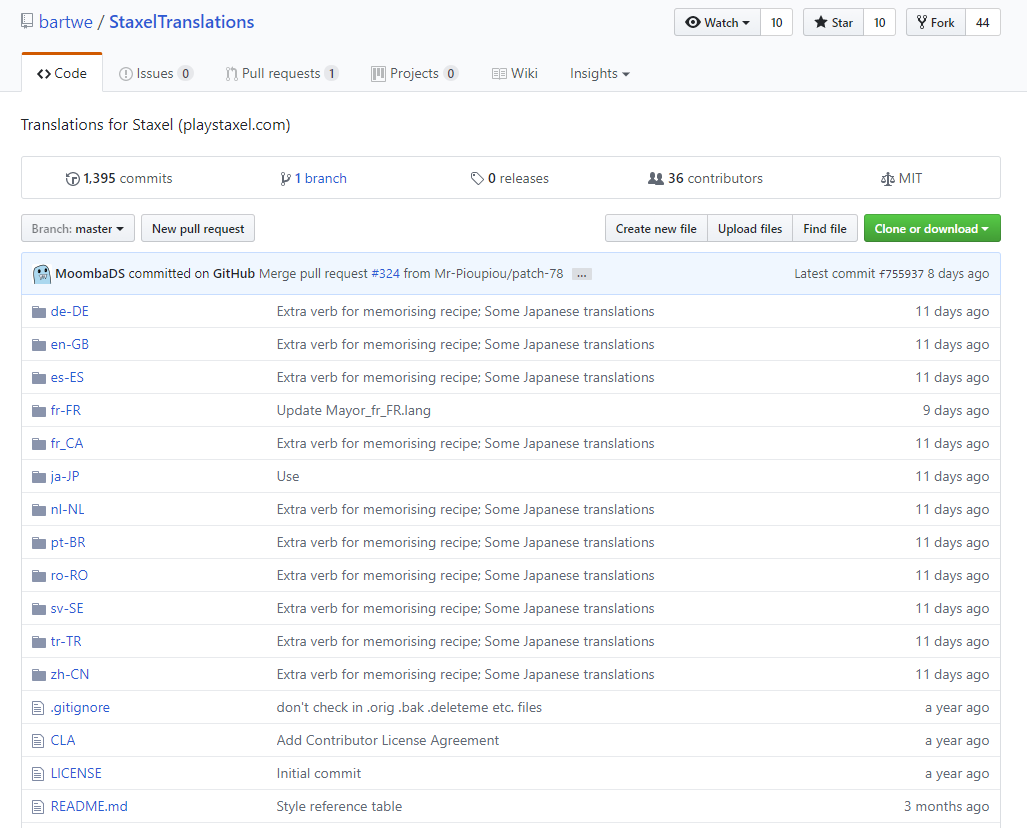
First of all, head over to https://github.com/bartwe/StaxelTranslations. You will be greeted by a page that looks like;
Don't be alarmed by this page. The majority of the information on this page is not needed for beginner users. The main thing you should be worried about is getting to the language you want to edit. On this page you will see a bunch of lines that start with an icon that looks like a folder. This is the area you want to be in. After each of the folders is a four character name with a dash in the middle. This is known as a Language Code. In the simplest form, the first two letters are the language you want. For example, "en" is English, "fr" is French and "ja" is Japanese. The second set of characters refers to the region of which the language resides. For example, "GB" is Great Britian English, which has differences to "US" which is American English. With that knowledge, click on the folder with the language you want. (If your language is not listed here, then you will need to create it. This will not be handled in this tutorial.)
After that is done, you will be greeted with another page. This page contains a whole bunch of files, which represent each of the things you can change. The vast majority of the files here, are used to replace NPC dialogue though there are some files near the bottom that are used to replace other bits of pieces of text, such as item descriptions. Click on the file you want to change in this section. Once you have selected the file you to edit, there will be a edit button (Highlighted by red in the image below.) that you will need to press.
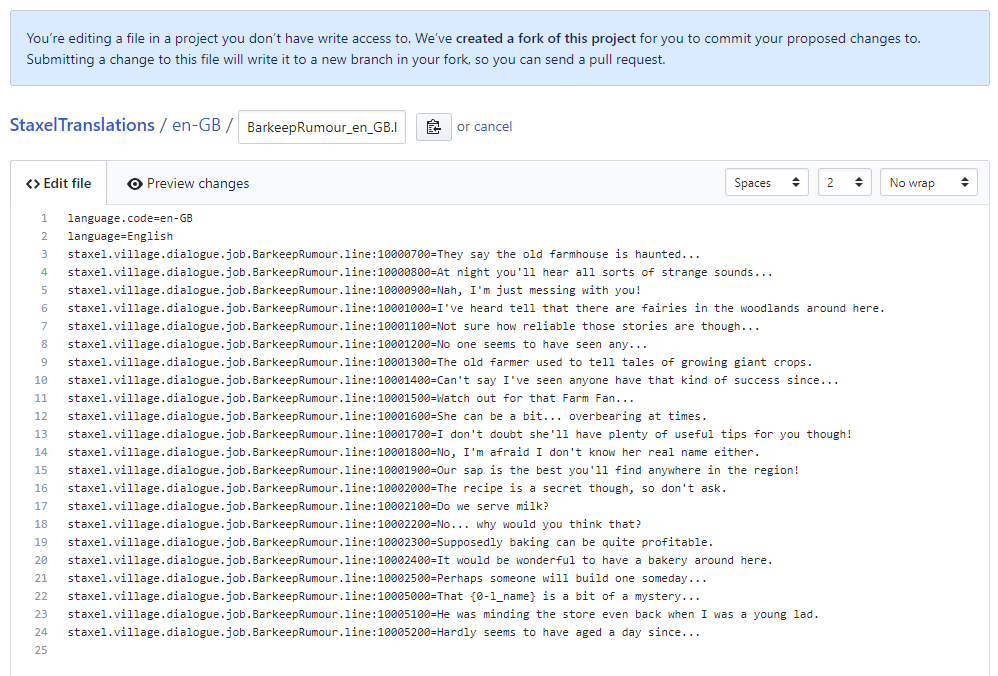
After doing that you will be arrive at a page that will look like;
You can safely ignore the message that appears up at the top. This is just saying that Github has made a "local" (Not actually local but effectively it is) copy of all the files for you to edit.
The middle is now a text editor which allows you to edit the lines. However first a quick explanation of what each lines does and means;
At the start of the file, there first two lines, that are listed below, which are similar to the folder names and are just there to setup the file correctly. In most cases, you will not be changing these.
language.code=ja-JP
language=日本語
Below is the first type of translation you may see. This is how any translation that has already been done should appear. These lines have not been edited in English, and therefore shouldn't need to be edited, however incorrect translations can happen.
//[Reference] 'Achievement unlocked: {0-achievement}!'
achievements.achievementUnlocked=アチーブメントがアンロックされました:{0-achievement}!
The first line is what is known as a "comment" which is signalled by the "//" at the start of the line. Essentially this line does nothing but tell you what the English translation of this line contains.
The second line is the actual translation for the line. The first part, in this case achievements.achievementUnlocked= is the thing being translated, and the part after the equals is the translation. If you edit this, there should be no gap between the "=" and the actual translation, as this gap gets added to the translation.
Below is the second type of translation you may see. This is how any translation that have not been done before.
//TODO Translate [Reference] 'Why am I not watching over the tavern you ask?'
staxel.village.dialogue.job.BarkeepWorkPlaceMissing.line:10000100=
These two lines act the same as the first section. The comment this time has "TODO Translate" in there, signifying that this line needs to be done. If you wanted to translate this line, add the translation after the "=" symbol, with no space between the equals and the translation. Once it is done, remove the "TODO Translate" leaving it like //[Reference] 'Why am I not watching over the tavern you ask?'
And finally, below is the third type of translation you may see. This is how any translation that has been done before, but the English version has since changed, therefore possibly leaving the translation out of date.
//[Validate] Delete this comment if or when the translation is accurate.
//[Reference] 'It's this way!'
staxel.village.dialogue.Tutorial.line:10003600=Par là !
This line needs to be double checked to see if the translation still lines up with what is being asked for. If you do edit this, or confirm it is correct, remove the entire line containing //Validate.
With that, you should know what each line does. However there is one extra thing that may confuse you. If we go back to the lines;
//[Reference] 'Achievement unlocked: {0-achievement}!'
achievements.achievementUnlocked=アチーブメントがアンロックされました:{0-achievement}!
You'll notice the text {0-achievement}. This is known as a "Variable". This is a value that will add in some other text to the statement, turning the sentence into "Achievement Unlocked: Locked and Loaded!" for example. These should be included, unchanged, in the translation, as these passages are often translated elsewhere. However the location of this variable does not matter, and may make more sense at the start of a sentence rather than the end.
With that you should have enough knowledge to edit these files.
Once you have finished editing the file, scroll down to the bottom of the page. There will be a section that looks like;
In the first box, you should put something like "Updated [Filename]'s English Translation" or something very similar. This names what you have changed, which is known as a "commit". The second box is where you add more details but this isn't necessary.
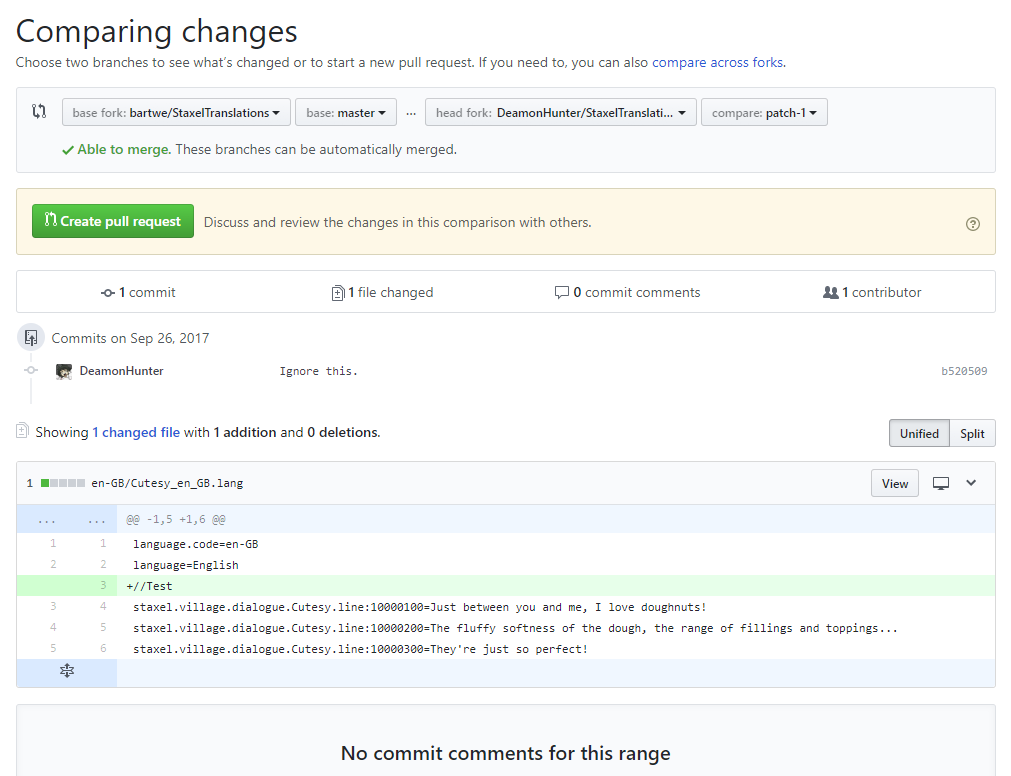
Once you have edited the first box, click "Propose file change". You'll be brought to a page similar to below;
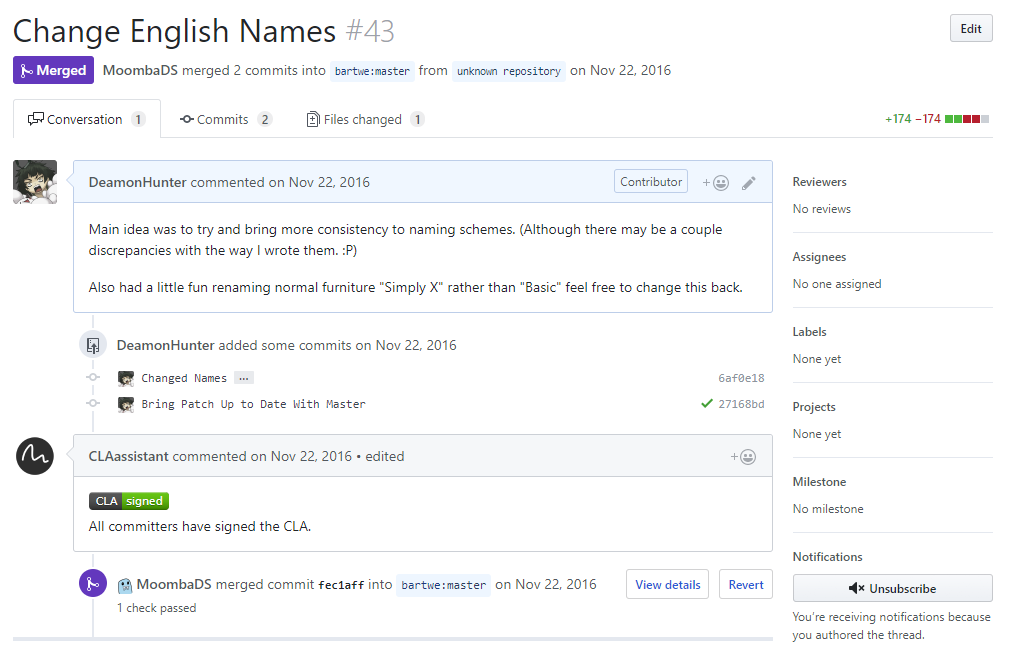
This page essentially shows you what you have changed, and you can look over it if you want to make sure what you have done. However the next step would be to click "Create pull request". This will create a new set of boxes where you clicked. This will take the name of the commit you did earlier, and also it's description. If you are happy with these just click on "Create pull request" once again. You will then go to a page that looks similar to;
At this point you are almost done. Once you see this page, please wait about 1 to 2 minutes and refresh the page. At this point a bot should have messaged that you need to sign a waver in order for your changes to be accept. Follow through with it's instructions.
When you have signed the waver, you are done. However in order to speed along the translations acceptance, it would be recommended to head to our Discord at https://discordapp.com/invite/Staxel and drop a message in #translations in order to say that you have done this.


