Expression
In Staxel, *.expression files are used to show an expression over an Animal's or Player's head. Expressions as used in game help emphasise the Entity's mood, but can be used in other circumstances.
Contents
Creating a *.expression file
Before starting, please run through Modding#Getting Started with Staxel Modding to make sure you are prepared to do these tutorials.
Expressions aren't too customisable. Its main use is to display an animation of models above something's head. As such the main thing is to create the Models needed for the expression.
There are two ways of handling the animation:
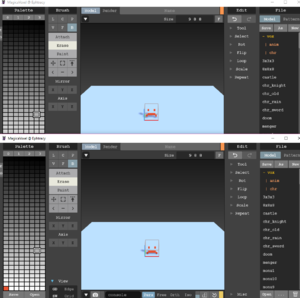
- Split each frame into it's own file. Like shown below;
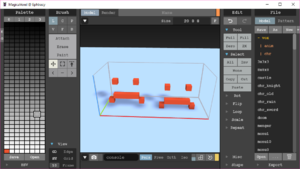
- Keep the frames in a singular file but limit what gets shown.
Note: Expressions do not need to have more than 1 frame. It's just assumed you have two or more frames in most cases however.
Once you have your expression animation completed, feel free to head on.
Ex come in all different forms, though many work off the same base. As such a number of tutorials are listed below. Before starting any tutorial, you may want to create a Model that you will use for the item. Unlike tiles, the game is not choosy on how large the item needs to be. So you can make anything, as long as it can be used.
Once you have created the model continue on.
Making it via Asset Manager
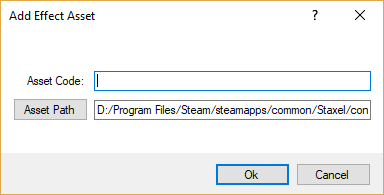
Follow Modding#Using the AssetManager to Create Mods to open up the Asset Manager. With the Asset Manager open, head to View → Effect Assets . When the new window is open head to Asset -> Add -> New Asset and the following window will show up.
First click on the button Asset Path and navigate upwards to the /content/ folder. Once there, open the /mods/ folder and create a new folder. Name this new folder to what you want the mod to be called and then open this new folder. When you open this folder give the asset a name and then click the Save as type: dropdown. Select Expression Asset. Press Save and then OK.
After the asset is created, it will have been automatically selected. With that it is now time to tell the game what you want to do with this Item. The following set of steps highlight the important properties, however you can mess with any property.
Adjust the Alias, FrameTime and Loop properties. After that click on Frames and then the [...]. With this you can now decide what you need to do:
If you created a single file with multiple frames:
- Click on
Add, click on the new "Path" then click on the Path property and click on the [...]. After you have done this add the following to the end of the path.?size={16,16,16}?offset={0,0,0}This new part tells the game to only load a section of the file. Thesize={16,16,16}refers to how many voxels you want this frame to be, while theoffset={0,0,0}affects what part of the file it will take. (If you want to see this in action look at the Bee Tile, in the Tiles section). Copy this path and adjust the values until you got all the frames in the file.
If you created a multiple files:
- Click on
Add, click on the new "Path" then click on the Path property and click on the [...]. Keep doing this until you have all the files.
And with that you have done everything needed to create an asset.
Making it via Text Editor
Start off by making a file with the extension .expression. Do this by making a text file then renaming it. When that is done, copy the following into the file;
{
  "code": "staxel.expression.Bad",
  "alias": "bad",
  "frameTime": 0.13,
  "loop": true,
  "frames": [
    "staxel/expressions/Bad1.qb",
    "staxel/expressions/Bad2.qb"
  ]
}
Sadly there are no pictures for this, as there is nothing to show. However here are the explanations for this file above which contain things known as properties. These explanations are listed below.
- "code" : A unique String that would be used to identify this object from others. For example this is like "staxel.item.crafting.BakingPowder" or "staxel.tile.grass". You will most commonly want to use you use the path to the one of the frames but replace
/with., as this will ensure your item will have a different code to all other items. - "alias" : A unique [Modding_Key_Terms#String|String]] that is the shorthand of the code. This allows you to skip typing out the entire code, but is not needed.
- "frameTime" : A Float that is the amount of seconds each frame will last.
- "loop" : A Bool. If this is true, the animation will continue looping forever until stopped. Otherwise will stop after it reaches the final frame.
- "usageframesffset" : A List containing what is known as Strings. These are all of the models that will be used to represent each frame.
With that you should be done.
If you created a single file with multiple frames, add the following to the end of the path. ?size={16,16,16}?offset={0,0,0} This new part tells the game to only load a section of the file. The size={16,16,16} refers to how many voxels you want this frame to be, while the offset={0,0,0} affects what part of the file it will take. (If you want to see this in action look at the Bee Tile, in the Tiles section). Copy this path and adjust the values until you got all the frames in the file.
Config Options
"code"
Valid options (String): A unique string which Effect this object is.
Default Value: No default value is specified. Always need to provide your own.
A string containing the code of the Effect the blob will be referring to.
"alias"
Valid options (String): A unique string which Effect this object is.
Default Value: If not specified, will not have a shorthand.
This is the shorthand version of the code. Useful for when you need to type it out a lot.
"loop"
Valid options (Bool): True or False.
Default Value: If not specified, will default to True.
This determines whether or not the animation will loop forever (until interrupted elsewhere), or stop after the last frame.
"frames"
Valid options (List of Strings): A list of strings containing the path to the model..
Default Value: If not specified, will not have a shorthand.
This is the path to the model to use for the frame. Frames are done in order.
If you created a single file with multiple frames, add the following to the end of the path. ?size={16,16,16}?offset={0,0,0} This new part tells the game to only load a section of the file. The size={16,16,16} refers to how many voxels you want this frame to be, while the offset={0,0,0} affects what part of the file it will take. (If you want to see this in action look at the Bee Tile, in the Tiles section). Copy this path and adjust the values until you got all the frames in the file.
"frameTime"
Valid options (Float): A positive decimal number.
Default Value: If not specified, will default to 0.13.
This is the length of time, in seconds, that each frame will stay visible.


