Difference between revisions of "User:Toketsupuurin/AutoTileTutorial"
(→Project 4: secondDirection and Wall Tiles - Painting With English Ivy) |
(→Project 4: secondDirection and Wall Tiles - Painting With English Ivy) |
||
| Line 643: | Line 643: | ||
Several of the upcoming projects will make use of some of these extended directions, so spend some time wrapping your head around navigating like this. Pull out an old rubik's cube or sketch on some paper until you have a handle on how it all works. | Several of the upcoming projects will make use of some of these extended directions, so spend some time wrapping your head around navigating like this. Pull out an old rubik's cube or sketch on some paper until you have a handle on how it all works. | ||
| − | == Project 4: secondDirection and | + | == Project 4: secondDirection and Making New Tags - Painting With English Ivy == |
<blockquote><pre style="color: red">This section is under construction. The tutorial mod has not yet been updated with this project.</pre></blockquote> | <blockquote><pre style="color: red">This section is under construction. The tutorial mod has not yet been updated with this project.</pre></blockquote> | ||
| Line 652: | Line 652: | ||
Now, building a house is bad enough, building an entire extra wall of ivy outside of it? Ugh. Let's save ourselves some carpal tunnel shall we? | Now, building a house is bad enough, building an entire extra wall of ivy outside of it? Ugh. Let's save ourselves some carpal tunnel shall we? | ||
| − | |||
| − | |||
<div style="clear: both"></div> | <div style="clear: both"></div> | ||
| Line 671: | Line 669: | ||
All good? Cool. | All good? Cool. | ||
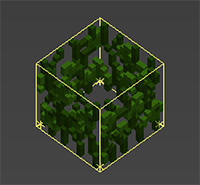
| − | If you think back to the sundial project you'll remember that we wanted to make sure that no matter which direction we rotated our object we always wanted it to be oriented the same direction. That's also exactly what we | + | The idea here is that we want to place a whole bunch of tiles at once, but we still want to be able to create single tiles when we need to. So we need a marker system to indicate to the game that we want "this area" to basically be flood filled with ivy. A little plus shape of ivy is okay, but it's an awkward shape, a square would be a lot better. You've already read about the orange octahedron that using |
| + | |||
| + | "secondDirection": "", | ||
| + | |||
| + | will get us to. The largest slice of that shape we can get onto a flat wall is a big diamond shape that's five blocks tall and five blocks wide. The center of that makes a very nice 3x3 square. That leaves us with the four outer points of the diamond to use or ignore as we like. | ||
| + | |||
| + | We could put our markers inside the 3x3 square. But we're trying to save on clicks, so let's not waste putting our markers into the same area as our flood fill. Let's pick the top point and consider what would happen if we just used a single point as our marker. Any time our marker tile is two blocks above our cursor we'll get a flood fill. That's a pretty common circumstance. It could make our attempts to do detail work a little difficult. The same would happen if our marker tile were a single tile in any direction. | ||
| + | |||
| + | [[File:AutoTileTutorial-MarkersAndFlood.jpg|left|frame|Our ultimate goal shape.]] | ||
| + | |||
| + | So let's use a pair of them. The far Left and Right tiles might be nice to use, but there'll be some cleanup around the corners to do because we won't be able to overflow off the edge of the building if we use those tiles for markers, but a lot of roofs in Staxel are pointed so we could fill everything if we used a vertically oriented set of marks. So, top and bottom it is. We'll still have to fill in a little, but it will be a lot less than otherwise. | ||
| + | |||
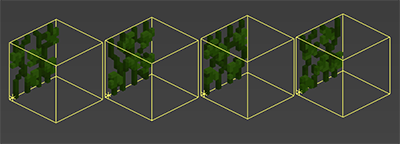
| + | Now the Ivy.tile file already has code in it that lets it stick to a wall. You can also rotate through all four ivy variations. | ||
| + | |||
| + | |||
| + | |||
| + | |||
| + | |||
| + | <div style="clear: both"></div><blockquote>'''It is left as an exercise to the reader to add in the left and right marker pair to make the ivy a more flexible tool.'''</blockquote> | ||
| + | |||
| + | == Project 4: Going Deeper - Wall Tiles == | ||
| + | |||
| + | Wall tiles have some unique considerations because of how they react to rotation. If you drop down a fence piece and rotate it, you'll see that it spins around the vertical axis. Now, mentally picture how that works if you apply a wall tile to the face of the cube you're rotating. It moves and basically rotates into the wall, and then onto the back side of the wall if you go farther. | ||
| + | |||
| + | Now, any tile we apply will actually be applied to the tile in front of that wall block, but the same problem applies. If we try to rotate the block that a wall tile is in, it will move and lift away from the surface to float in mid-air. This is great if you have a wall lamp that just needs to stick to a wall. It doesn't change shape, just rotation. The second you want to add variety of appearance into your wall tiles you need to start leveraging your rotation to start solving two different problems at once. | ||
| + | |||
| + | If you think back to the sundial project you'll remember that we wanted to make sure that no matter which direction we rotated our object we always wanted it to be oriented the same direction. That's also exactly what we needed to do with our ivy! Let's see how that solution helped make our starter ivy file. | ||
Pull up the original SundialKit.Tile, not the one you worked on. The finished version has a massive mess of tile categories to check that we really don't care about. | Pull up the original SundialKit.Tile, not the one you worked on. The finished version has a massive mess of tile categories to check that we really don't care about. | ||
| Line 677: | Line 701: | ||
Now compare the autoTile in your sundial with the autoTile in the pre-provided Ivy file. | Now compare the autoTile in your sundial with the autoTile in the pre-provided Ivy file. | ||
| − | That looks ridiculously similar doesn't it? It is in fact, the same code, barring the fact that for each rotation we're calling a different tile to place instead of the same sundial tile. | + | That looks ridiculously similar doesn't it? It is in fact, the same code, barring the fact that for each rotation we're calling a different tile to place instead of the same sundial tile. That's why I didn't go over it in the main tutorial. You'd already done it. |
This might be my favorite example of just how differently the same underlying autoTile logic can appear with just a different perspective on things. It still blows my mind a bit. | This might be my favorite example of just how differently the same underlying autoTile logic can appear with just a different perspective on things. It still blows my mind a bit. | ||
| Line 683: | Line 707: | ||
Oddly, this is also behaving almost exactly like our Swapping Pots tile swapping catalog too. But on that project we didn't care a bit about rotation because the pots were rotationally symmetric. | Oddly, this is also behaving almost exactly like our Swapping Pots tile swapping catalog too. But on that project we didn't care a bit about rotation because the pots were rotationally symmetric. | ||
| − | So: How did we go from a non-rotating sundial to flipping through a catalog of flat wall tiles? | + | So: How did we go from a non-rotating sundial to flipping through a catalog of flat wall tiles? Now, we could have gone the sundial route, and just used one single tile over and over, for everything. The problem is, that gets visually repetitive really quickly. That's fine for ceramic tiles, but not so fine for organic vines. Remember what I said earlier about changing visual appearance? We want the visual interest of a rotatable tile like this: |
[[File:AutoTileTutorial-TheoreticalIvy.png|left|frame|The ivy block we wish we had.]] | [[File:AutoTileTutorial-TheoreticalIvy.png|left|frame|The ivy block we wish we had.]] | ||
| − | but we can't use that, because then we'd have a full three sides of ivy hanging out in mid-air. So our four tiles each have one side of that theoretical ivy cube, and the setup effectively only makes one side of our cube visible at a time. | + | but we can't use that, because then we'd have a full three sides of ivy hanging out in mid-air. So our four tiles each have one side of that theoretical ivy cube, and the setup effectively only makes one side of our cube visible at a time. |
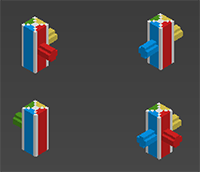
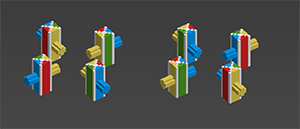
| − | Think about how you'd go about making that | + | Think about how you'd go about making those four sides of that theoretical ivy block into four QB files, one for each face. Would it look something like this?<div style="clear: both"></div> |
[[File:AutoTileTutorial-ExpectedIvy.png|left|frame|How you would expect to build an ivy block?]] | [[File:AutoTileTutorial-ExpectedIvy.png|left|frame|How you would expect to build an ivy block?]] | ||
| Line 700: | Line 724: | ||
<div style="clear: both"></div><blockquote>'''You don't have to take my word for this. This is another really good exercise to use to wrap your head around how rotation works in the game.''' ''Spend some time making a copy of your ivy tiles and QBs. Adjust the rotation of the QBs to the orientations you'd have expected and then spend some time messing about with the tile file to really harden up your understanding of how this works.''</blockquote> | <div style="clear: both"></div><blockquote>'''You don't have to take my word for this. This is another really good exercise to use to wrap your head around how rotation works in the game.''' ''Spend some time making a copy of your ivy tiles and QBs. Adjust the rotation of the QBs to the orientations you'd have expected and then spend some time messing about with the tile file to really harden up your understanding of how this works.''</blockquote> | ||
| − | |||
| − | |||
| − | |||
| − | |||
| − | |||
| − | |||
| − | |||
| − | |||
== Project 5: Fixing the Arched Window == | == Project 5: Fixing the Arched Window == | ||
Revision as of 13:56, 13 January 2020
Contents
- 1 AutoTile Tutorial by Toketsupuurin
- 2 TL;DR: Make my Poster Stick to a Wall!
- 3 Prewritten AutoTile Instructions
- 4 Definitions
- 5 The autoTile Rotation Model
- 6 Optional Exercise: Getting Comfortable With Rotation
- 7 Project 1: Wall Mushrooms That Auto-Sense Surfaces
- 8 Using and Abusing representativeTile
- 9 Project 2: Abusing representativeTile - Swapping Pots
- 10 Project 3: Accepting and Rejecting Tiles - A "North" Oriented Sundial
- 11 Looking at Tiles Farther Away
- 12 Project 4: secondDirection and Making New Tags - Painting With English Ivy
- 13 Project 4: Going Deeper - Wall Tiles
- 14 Project 5: Fixing the Arched Window
- 15 Project 6: Bag of Mixed Flower Seeds
- 16 Project 7: Cecile's Beaker of Acid
- 17 Master Project: Roof and Fence Systems: Going Deeper
- 18 Congratulations!
AutoTile Tutorial by Toketsupuurin
AutoTile is a fairly powerful system that allows a tile to change appearance based on the local context. What blocks surround a tile can affect how it looks and rotates.
That said, getting the most out of autoTile will require wrapping your brain around the way autoTile sees the world.
The simplest implementations of autoTile should be pretty painless for even a new modder. This sequence of tutorials will cover tiers of difficulty, new concepts in bite-sized chunks, and will introduce practical ways to utilize autoTile for different effects. Later sections of the tutorial will make use of the Tutorial Mod. In theory it's an optional, but it contains all of the exercises referenced in the tutorial for you to examine in detail and the .QB files could be useful to troubleshoot your own autoTile logic. When the front and back of a fence look identical, it's really hard to diagnose what's going on. It's not a code mod and won't hurt your game at all, even if you uninstall it.
Note: While this tutorial is finished enough to launch, there are more projects I have in mind and areas I haven't really talked about. I'm still going to add to this and you'll find more topics added on in the future until I feel it's complete.
TL;DR: Make my Poster Stick to a Wall!
The first thing to know about autoTile: Don't reinvent the wheel.
The game has a number of pre-written autoTile instructions that probably do 90% of the things you want. If there's an object in the game that behaves the way you want your item to behave: Great! Go pull those instructions out of the game file, and change the Codes to the ones for your object. Make sure that your object is rotated in the same direction in the .QB as the orientation of the object in the original .QB and you're golden.
Prewritten AutoTile Instructions
You'll find autoTile instructions in one of two places, generally, a *.config file or a *.tile file. This is a list of all the files in the vanilla game that have autoTile instructions:
- staxel/tileObject/vines.config, walllight.config, wallObject.config
- Makes the object stick to a wall. At a brief glance they all look the same.
- staxel/tileObject/airship/RopeFenceStraight.tile
- A fence with a straight, corner, T section and cross.
- staxel/tileObject/museum/paintings/paintingBase.config
- Makes the object stick to a wall. (At a brief glance looks the same as vines.config.)
- staxel\tileObject\mushroomIsland\mazeWalls
- basically a fence with a straight, corner, T section and cross. (See the Rope Fence to compare, I'm not sure if they're identical.)
- staxel/tileObject/quest/Morel/ToughMushrooms.tile and SmallMushroom.tile
- These are something special. They will destroy certain kinds of blocks they are placed on. These are the only objects that do this. BE EXTREMELY CAUTIOUS when using this because it will indiscriminately destroy blocks and they don't go through a proper spawn on break. The tile just gets deleted and replaced. I'll cover this stuff in an advanced section.
- staxel/tileObject/roofing/black/Black_Straight.tile
- All the roofs use this logic, I'm only listing one color here. It's generalized to look for categories instead of specific blocks and is only specific when it comes to the block you place.
- staxel/tileObject/serverVillage/FenceStraight.tile
- A three piece single sided fence with inner and outer corner tiles.
- staxel/tileObject/serverVillage/exterior/WoodenDeckingRailing.tile, HedgeStraight.tile, RoughWoodenFenceStraight.tile, and BlackFenceStraight.tile
- a two piece fence with a corner piece. (The hedge fence also has a Single tile which is not part of the autoTile logic and is a separate block.)
- staxel/tileObject/serverVillage/exterior/WoodenPoleFenceStraight.tile
- a five piece fence, the most complicated one in vanilla staxel. Has a "middle" piece with no post.
- staxel/tileObject/serverVillage/exterior/SmallHedgeEnd.tile
- A three piece fence with a straight, corner and end piece.
- staxel/tileObject/serverVillage/exterior/SmallWoodenPoleFenceMiddle.tile
- a four piece fence like the rope fence.
There are other autoTiles out there in modding land. My Furniture mod makes extensive use of autoTile in the fences (6 pieces with 2+ variations for each and improved logic) and in additional decorative roof pieces like the ridge tiles. Any custom autoTile I've written for a mod can be used without asking. (But poke me on the Discord if you use it; I'd love to see what you did with it!)
Definitions
There are three terms I'll use in this guide. They're all related but different concepts. I'll try to specifically use the correct term, but under certain situations some of them are synonymous with the others.
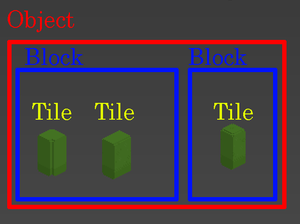
- Tile
- A tile is an instance of a thing that has been placed in the world of Staxel and is permanently attached to the grid of the world until you or an NPC changes that. A tile is also any item in the game that has a .TILE file, usually it also has a unique .QB file to go along with it.
- Block
- I may refer to an item placed into the world grid as a block. In this use it is synonymous with the first definition of "Tile". More importantly, a block is any item that takes up a single space in your inventory. Most blocks have one .TILE file associated with them. AutoTile allows for a sort of substitution where one .TILE can be represented in the game by a different .TILE you then use autoTile logic to access each different tile. The vanilla game uses as many as 6 .TILE files in 1 block. You can use more.
- Object
- Everything that uses autoTile is a tileObject. Materials (like dirt or grass) do something that can be compared to autoTile, but is handled in a completely different manner. Materials are not covered in this tutorial at all. When I refer to "the object" I'm usually speaking about the thing you're working with in an abstract sense. A vanilla roof object has 3 blocks, 1 of which is made up of 6 tiles. The hedge fence referenced above is one conceptual object, with two blocks, one of which has two tiles.
- Code/Instructions/Script/Logic
- Pedants will complain that autoTile isn't programming, so it's not really "code" nor is it really a "script". Fair enough. Colloquially, it counts, but I'll generally try to avoid the term "code" as Staxel uses that term for something else. I prefer the terms "instructions" or "logic," and I'll endeavor to avoid the others, but I may not always succeed.
- autoTile
- I call it autoTile instead of Auto-Tile, Auto-Tiling or anything else because when you're writing the instructions you'll write it as "autoTileInfo" and I'm trying to reinforce that in your head. Computers are picky about capitalization and spelling when it comes to Jsons or any kind of coding or scripting, really. The reason for the weird capitalization pattern is entirely due to a programming convention.
The autoTile Rotation Model
I'm sure you'd love to skip all my nattering and get onto the practical stuff. Unfortunately, to go much of anywhere with autoTile you will have to grok how autoTile functions, the model it views the world by, and its inherent limitations. So, Let's talk about rotation and points of view. There are three possible types of rotation we're dealing with when we think about rotation in Staxel:
- The rotation of an already placed tile, like a bed. This is Cardinal rotation and can be thought of as equivalent to North, South, East, and West. This rotation never changes in regards to the orientation relative to the world. Once you place a block, you can consider it under cardinal rotation.
- The rotation of the player. This has no bearing on autoTile results at all. Where you are standing and the direction you are facing in relation to the block you are placing has no impact on the autoTile code at all. What it does do is make it harder for you to keep track of rotation directions because it adds added complexity that can be distracting, depending on how your brain deals with spatial reasoning. For the purposes of autoTile, you can think this as Nautical rotaton, likening the player avatar to a boat and use terms like port, starboard, fore and aft. We won't use this much.
- The rotation of the tile you are holding in your hand. This is the model that autoTile operates under. This is a relative direction scheme using right and left, front and back. This is Ego-centric or Relative rotation.
The key thing to remember is that autoTile is block-centric (Relative), NOT player-centric (Nautical). The block you are placing doesn't care where you are standing or what you can see. It doesn't care about north south east or west. All it cares about is where something is relative to it. When you write up autoTile instructions what you're really saying to the block is "look in front of you," or "look left."
This leads into some pretty serious limitations and benefits of the system.
The major benefit to operating this way is that you only have to write one quarter of the logic you'd have to write in a cardinal setup. "Look north and if that has a fence piece, place a straight tile. Look east and see..." versus "look in front of you and if there's a fence there place a straight tile.
The major downside is that any given block will only ever have 4 possible placement options for a designated location. You can't say "do one thing if it faces north, and another thing if it's east," because it doesn't understand what east or north are.
Optional Exercise: Getting Comfortable With Rotation
You don't have to do this, but if you're having any issues really internalizing how rotation behavior works in Staxel, I encourage you to download the autoTile mod and follow the exercises below. If you're comfortable with it, go ahead and skip to the next section, but I really suggest you at least give it a skim.
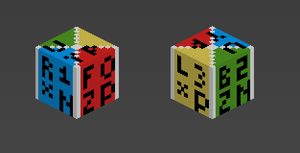
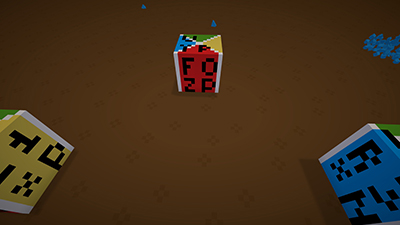
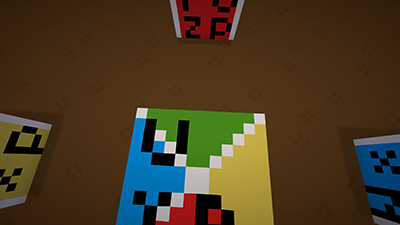
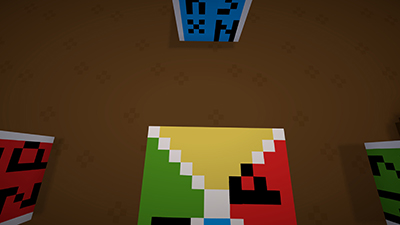
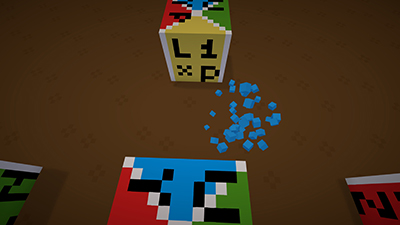
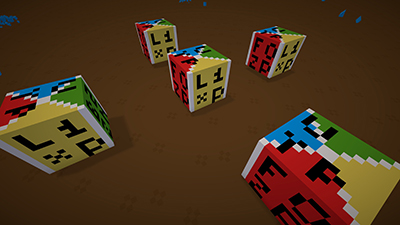
Take the tutorial block. Notice that it has a series of letters and numbers on it. These are cheats to tell you what side of the block you're looking at. The upper left corner marks the direction of the side. (Front, back, left, right, up down) the upper right corner shows the rotation number (0-3), the bottom half shows the face's axis name (xp, xn, yp, yn, zp, zn.) These are also color coded. Every object in the mod is, so you can always tell exactly what face you're looking at. You can use this to troubleshoot autoTile instructions, or any other modding you might be doing.
Now, put down four tutorial blocks, one in each cardinal direction, leave out the middle, and make the hole big enough that you can stand in it. (Like a 5x5 plus shape, but missing everything but the tips. DO NOT rotate the blocks. They should all face the same direction.
For this exercise, you're going to pretend that you ARE a block being placed. Go stand in the center of the four blocks. Look at the block in front of you. Take a note of the face you can see.
Now turn 90° and note what face you see this time. Do this a few more times to get a feel for what's going on. Try turning the other direction too.
Now, remember, each of those cubes was placed to have the same orientation. They are, effectively, all facing north.
And yet, when you spin in place, it looks like they've all been rotated. The only thing that matters to autoTile is how the surrounding blocks APPEAR to be rotated RELATIVE to the block to be placed.
This holds true no matter what direction an autoTile is told to check. (Checking the block in front of you for this example is just easy to see because it's right in your field of view.) To prove this to yourself, go stand on top of one of the tutorial blocks, face a cardinal direction (whatever you think north should be.) Take a note of the color that would be between your toes.
Now, turn 90° and look at the color between your toes. It changes relative to you, no matter where you stand.
This may seem simplistic, but it's really important to internalize this principle. Make sure you remember you've been pretending to be the block. Pull out the tutorial block and place it in the spot I had you stand originally. Break it out, rotate the one in your hand and place it again. Do this a few times, and pay attention to what the placed block "sees" in relation to thinking that the "F" face is the block's eyes.
Now change your position so you're looking at the cross from a different angle and place the block without rotating it from the last time. Move around, placing the block from several different angles without rotating it to prove to yourself that where you stand makes no difference to the rotation of the block you place.
Once you really have a handle on this, you've gotten past a good chunk of the hard parts of autoTile.
Project 1: Wall Mushrooms That Auto-Sense Surfaces
I'm going to assume that you went through the basic modding tutorial so you know what blobs are, and you know how tile files work and all that jazz. I'm also going to assume you're using Qubicle whenever I refer to looking at a .qb file. (If you aren't, that's fine, just bear in mind that you might have to mirror over a certain axis in other voxel editors so if you're trying to figure out right and left you'll have to take that into account. Check the basic modding tutorial for more information on that.) One more thing: use a text editor, not the asset manager. You can't rely on it for this and you really shouldn't rely on it for anything other than as a reference for options you can use. It doesn't save all your decisions properly.
If you've played Staxel you've probably encountered these little fellas:
You can buy these from the catalog or from an airship merchant. We're going to take a look at the pre-written autoTileInfo that the wall mushroom uses and then expand on that to add in the ceiling and floor mushrooms in one object.
Make yourself a working folder somewhere other than the staxel install directory. The staxel install directory can get overwritten by the game and you can lose all your work. It's safest to keep your work elsewhere and make copies of the files to drop into the install folder. Just remember that any file paths we put in our text files need to assume they're living in the install folder and not the working folder.
Your install directory will be somewhere like this:
C:\Program Files (x86)\Steam\steamapps\common\Staxel\content\mods\YOURMODFOLDER\
Your working directory can be anywhere you like, but it should look something more like this:
C:\StaxelMods\YOURMODFOLDER\
It can be in your documents folder or anywhere else, really, but it had better stay far, far away from your install folders of all sorts. If Staxel or the content builder knows how to get to it, you shouldn't be putting your working files there.
Staxel's vanilla data files can be found at:
C:\Program Files (x86)\Steam\steamapps\common\Staxel\content\
with the majority of the art and asset files in:
C:\Program Files (x86)\Steam\steamapps\common\Staxel\content\staxel\
If I tell you to go looking for a file in the vanilla game it will be in that ..\content\ folder and 99.9% of the time will be in ..\content\staxel\, alright? Get used to digging around in those folders if you're going to mod Staxel. You'll spend a lot of time there.
Go to your content folder and copy each of these files to your working directory:
..\staxel\tileObject\fairyVillage\GlowingMushroom1.tile
..\staxel\tileObject\mines\CeilingMushroomBlue1.tile
..\staxel\tileObject\mines\MushroomGreen1.tile
..\staxel\tileObject\walllight.config
Go ahead and rename the four files as follows:
GlowingMushroom1.tile        StickyMushroom1Floor.tile
CeilingMushroomBlue1.tile    StickyMushroom1Ceiling.tile
MushroomGreen1.tile          StickyMushroom1Wall.tile
walllight.config             StickyMushroom1.config
Now open all three tiles up and change their codes right away so you don't forget. Best practice will be something like:
mods.YOURMODFOLDER.StickyMushroom1Floor
mods.YOURMODFOLDER.StickyMushroom1Ceiling
mods.YOURMODFOLDER.StickyMushroom1Wall
Close the Floor and Ceiling files. We won't need them for a bit.
Pull up the wall file and go look at the inherits line:
"__inherits": "staxel/tileObject/walllight.config",
change this to:
"__inherits": "mods/YOURMODFOLDER/StickyMushroom1.config",
Now look for this entry in the wall file:
 "pricing": {
   "catalogueUnlockedFromStart": false,
Set "catalogueUnlockedFromStart" to true so you can easily get to the Sticky Mushroom when we test it in game.
 "pricing": {
   "catalogueUnlockedFromStart": true,
and save your work and close any open tile files.
Open up StickyMushroom1.config. Now, take a look for the blob that starts with "autoTileInfo". autoTileInfo will look like this:
 "autoTileInfo": [
   {
     "directionsToLookIn": [
       {
         "direction": "left",
         "tileCategoriesToLookFor": [
           "block"
         ]
       }
     ],
     "results": [
       {
         "rotation": 1
       }
     ]
   },
   {
     "directionsToLookIn": [
       {
         "direction": "back",
         "tileCategoriesToLookFor": [
           "block"
         ]
       }
     ],
     "results": [
       {
         "rotation": 2
       }
     ]
   },
   {
     "directionsToLookIn": [
       {
         "direction": "right",
         "tileCategoriesToLookFor": [
           "block"
         ]
       }
     ],
     "results": [
       {
         "rotation": 3
       }
     ]
   }
 ],
First, an overview of how autoTile works:
When you hold a ghost object in Staxel before placing it and you rotate it, Staxel will run through the entire autoTile blob in order. It does this every single time you rotate the object, checking each time to see which result it should use. It will use the last valid "directionsToLookIn" it finds. So if you have your mushroom in a corner and it could stick to either the back or to the right and your logic says "check the back first, then check the right" the game will offer you the chance to place the block on the right wall, not the back wall. So, we have four directions we will have to check, because the mushroom can stick to any of the four walls.
...Now, wait a minute, there are only three "directionsToLookIn" in the original file!? What gives?
When Staxel runs through the entire autoTile and doesn't find any valid results then it defaults to the "voxels" defined in the .tile file and rotation 0. You don't have to define every test case, just the ones you don't want to be the default tile and rotation.
So we don't need to test for the default state unless there's a conflict somewhere and we want to guarantee the default will win out in some conditions. At the very bottom of the config file you're working on is a bunch of information about where the tile can attach and whatnot. If you hit the default state and those other conditions say it's an invalid place for the tile then you won't be allowed to place it. Figuring out those bits are beyond the scope of this tutorial, but do keep in mind you might have to mess with those.
Now, on to structure:
autoTileInfo is a list [] of blobs {}. Each blob in an autoTile list has a specific structure:
   {
     "directionsToLookIn": [],
     "results": []
   },
Note that "directionsToLookIn" and "results" are both lists. We will make use of this fact in a future project. For now, just remember that each of these lists needs at least one blob giving it something to do.
"directionsToLookIn" is a test condition and "results" contains a thing to do if the test is true. Let's look at the contents of the first instance of "directionsToLookIn":
       {
         "direction": "left",
         "tileCategoriesToLookFor": [
           "block"
         ]
       }
These are the bare minimum number of things Staxel needs to do an autoTile check.
- "direction" tells Staxel what block to look at relative to the block being placed. That's the block it's going to run its tests on. You must have this; Staxel has to know what tile to test.
- "tileCategoriesToLookFor" (or "tilesToLookFor") you must have one or both of these. AutoTile must have a thing to look for. You can't simply say "anything will do except these things."
Anything else you might see in a "directionsToLookIn" is optional, and we aren't worried about them at the moment because we just want to stick our mushroom to the wall.
Staxel understands six directions: up, down, left, right, front, and back. It also understands 4 rotations. 0, 1, 2, and 3. Rotation 0 is the direction your mushroom faces in the .qb file.
"tileCategoriesToLookFor" checks the categories section of the tile for the specific tags you've specified. The game has some standard tags like "block", or "red" but this can also be a tag you specifically make up just to use in an autoTile so you can be certain it's only triggering when you want it to. Expanded Furniture fences use "EFCorner" to identify that, not only is it a corner piece, but it's a corner piece of a fence using my system so I know it will behave properly and I'm not just getting some random object someone tagged as "corner". I'll cover that more in a future project. "block" basically means: "look for a wall, floor or ceiling."
We want our mushroom to stick to any wall, even walls we don't know about right now. We could dig through the files and name every single tile that acts as a wall, but that doesn't take other mods into account, and if a player has one mod then they have a hundred. It's best to use a category in this case, specifically the "block" category as those are usually walls. And that's what the devs did.
So now that you have tests you need something to happen if a test is true. "results" is how we do that.
At a bare minimum you need to give "results" a "tileToPlace". That's the whole point. If you don't give it a "tileToPlace" then Staxel will assume you want to place the default tile. Which is why you don't see it in this autoTileInfo. it's basically assumed. This is useful if you're going to be re-using an autoTile script for a lot of different things. At the moment, we aren't planning to expand this to be re-used, so let's just add it in so there's no confusion about what tile needs to be placed. Adjust the three results sections with the "tileToPlace" line as shown:
     "results": [
       {
         "tileToPlace": "mods.AutoTileTutorial.Exercises.StickyMushroom1Wall",
         "rotation":
If you don't include a "rotation" line then the game will conclude you want a random rotation placement and the ghost piece will spin like a dervish in a dryer until you click to place the piece. This little feature is used nowhere in the game, and can be very disconcerting if you don't expect to see it.
Commenting out the "rotation" line by putting "//" in front of it can be very useful to debug your autoTile instructions if you want to figure out which test is winning, or even if a test ever wins at all. If the piece spins then you've found the test that's winning and you can figure out what's going wrong.
So, one rotation for each direction except the default! That makes sense. What we're basically doing is saying "is there a wall there? Great! Which direction is it? Ok. I need to rotate the mushroom this way to stick it to the wall."
Results can actually be completely empty. This will result in the default tile being placed in a random postion. Don't do this. You should always set a rotation at the very least, unless you're debugging or have a good reason not to.
While we haven't changed much at this point, why not save now, copy your files into the install folder and run the content builder? It pays to make sure your starting foundation is stable before you start making a lot of changes to an autoTile. I'll be here when you get back.
...
Got green mushrooms sticking to the wall? YAY!
Right, Now you're familiar with the basic structure and premise. Let's start changing things. First thing's first:
Always make a backup of your autoTile file. You have a known good instruction set. Keep a copy just in case you mess things up horribly. Make a new backup every time you test it and have good results for the part you're working on.
So: right now you have a mushroom that will stick to any wall, but won't stick to the floor or ceiling. Now, you can't use your wall mushroom voxels for the ceiling or floor because they would look weird. So we're going to have to make some new tile files... well, really we're adapting files we already have. I'm sure I don't have to tell you which ones they are. These will be normal tiles; they won't have autoTileInfo in them. What they will have is the "representativeTile" key instead.
representativeTile is basically a way of telling the game "this tile I'm working on doesn't get its own block. It's part of the same block as the representativeTile and the representativeTile is its proxy." Any time you break a tile with a representative you will get the representative back instead of the block you broke (if the spawn percentage allows it.) What this means is that you can attach a bunch of different tiles together and use auto tile logic to decide what gets shown.
If you try to place a tile with autoTileInfo (say, mods.bluebrickcorner in the .tile file for mods.bluebrick) that block must have an associated representativeTile entry. (mods.bluebrickcorner must have representativeTile pointing to mods.bluebrick) If you try to place a tile that you haven't made part of the block you'll get an error.
There are a few things we need to do to make this clean. We want the two new tiles to be invisible to the player. As far as the player is concerned there is only one block, not three, so we need to make sure that they have no other way to obtain it.
Make two new blobs that direct the game to look up and down, and place either the ceiling or floor mushroom tiles instead. It should look like this:
    {
     "directionsToLookIn": [
       {
         "direction": "up",
         "tileCategoriesToLookFor": [
           "block"
         ]
       }
     ],
     "results": [
       {
         "tileToPlace": "mods.AutoTileTutorial.Exercises.StickyMushroom1Ceiling",
         "rotation": 1
       }
     ]
   },
   {
     "directionsToLookIn": [
       {
         "direction": "down",
         "tileCategoriesToLookFor": [
           "block"
         ]
       }
     ],
     "results": [
       {
         "tileToPlace": "mods.AutoTileTutorial.Exercises.StickyMushroom1Floor",
         "rotation": 1
       }
     ]
   },
You can choose any rotation you like. Go ahead and put this at the very top of the autoTileInfo section, before all the other "directionsToLookIn" blobs. Make sure you're inside the [ but outside the {. That's all for the autoTileInfo, so you can save and close the config file, but we aren't quite done yet. We still need to attach all three tiles together to make one block in the game. Open up the Ceiling and Floor tiles and look for this section:
 "pricing": {
   "catalogueUnlockedFromStart": false,
   "buyable": true,
   "sellPrice": ##,
   "value": ##
 },
 "searchable": true,
The numbers in sellPrice and value don't need to be changed. Check that both files have these values, and correct them if they're wrong:
"catalogueUnlockedFromStart": false,
"buyable": false,
"searchable": false,
With "buyable" false stores won't stock it and it won't appear in the catalog. With "searchable" false it won't show up in a search.
Now, on a new line, let's say right after the "searchable" line, in both the Ceiling and Floor files add this:
"representativeTile": "mods.AutoTileTutorial.Exercises.StickyMushroom1Wall",
Save it, copy it all to your install folder and test it!
The mushroom you just made is included in the ../mods/AutoTileTutorial/Exercises/ folder. The files are named "StickyMushroom1XXXXX.XXX.ANSWERS" Remove the ".ANSWERS" file extension to have them load into game and see them working. Search for "Tutorial" or "Sticky" in-game to find the block.
Project 1: Going Deeper
"Going Deeper" sections are going to get into decision making, and higher-level theory on the exercises you've just done. These are optional, but if you want to understand what you're doing and not just how to do it, this part is for you.
For the Sticky Mushroom I had you put the up and down tests at the beginning of autoTileInfo. That decision was entirely arbitrary on my part. If I had you put those checks at the end it still would have worked...but the behavior would be slightly different.
Go pull up the mushroom deeper block (Search for "tutorial" or "deeper" in the Staxel catalog. It's the purple wall mushroom.) and compare its behavior to the behavior of the sticky mushrooms you just made. I've made the color purple so that you can easily distinguish between the Sticky mushroom you just made and the Deeper mushroom. Aside from the color and the placement of the two autoTile tests they're identical.
Make sure to test both mushroom's rotational behaviors at the edges and corners of ceilings and floors, and compare that to how they both behave in the middle of open floor, wall, and ceiling. Check all four directions too. When you test make sure you don't just rotate the block once, but rotate through all four possible rotations for each square you test.
The Sticky Mushroom has the up and down tests at the beginning of the autoTileInfo; The Deeper Mushroom has them at the end. See the difference in how they behave?
This is our first compromise in our autoTile logic...And it is a compromise. We have six directions we want our mushroom to stick to...but only four rotational directions. Which means that we WILL have conditions where our desired behaviors conflict with each other, like at the edges and corners of a room in this case. So now we need to decide on our priorities.
The last test that passes is the one that sticks, so in the deeper mushroom the floor and ceiling tests win any conflicts. In the sticky mushroom, it's the walls that win.
Now, in this case, I personally like the sticky mushroom's behavior better, because I can manage to get a choice between the wall and ceiling or wall and floor mushrooms when there's a conflict. But you might like the fact that the deeper mushroom lets you rotate the floor or ceiling mushrooms. Or perhaps you have a different project and you absolutely don't want the wall object to come within a tile of the floor or ceiling.
Also: don't forget to make a test case for the worst-case scenario: a one block high hole. This is a tiny little mushroom. someone might actually try to stuff it in a little nook. Your last test case is going to win out. What tile do you want to win?
There is no right or wrong answer here. The answer is "whatever looks/feels the best while still behaving the way I want." You could even put the down check at the top and the up check at the bottom...or vice versa! Play around with the order of the tests until you're satisfied...or at least until you hit a tolerable compromise.
Making the remainder of the wall, ceiling and floor mushrooms into objects similar to the Sticky mushroom we just made is left as a practice exercise.
Using and Abusing representativeTile
Pull out some of the standard sloped roof blocks and play around with them a bit. Check out how the autoTile behavior works. When you rotate it's just the roof changing shape. This is how Staxel expects you to use representativeTile, and it's basically how we used it in Project 1. You can grab a fence or hedge and do the same thing too.
representativeTile is used to swap between tiles. It's how we can fold multiple tiles into one block. Usually that means changing a straight fence into a corner or something, but it doesn't have to. autoTile doesn't actually care what each tile's art is. You're the one who provides and decides the context of the blocks.
Pull up the rotational block. Rotate it a few times to see the behavior. Four completely different objects packed into one. Pretty cool, huh?Also pay attention to the candy cane rotation. Does it ever rotate? Under any circumstances at all? Have you tried it on different surfaces? How about placing it on top of flat roofs you've rotated?
So, what's going on here? Every tile placed in the game world has a defined rotation. Material blocks (Wood, stone, floors, dirt) can't be rotated by the player. They just have a set rotation of 0 all the time. Roofs can be rotated though, and autoTile is relative. It's even relative when you set the rotation of the block you're placing.
This is flat-up abuse of representativeTile, but we're exploring the limitations of the system and what it will let you do.
There are some downsides to this, though: I'm using the function that would normally be used for rotation to instead swap out a tile. This means that I can't really rotate my object unless I use my test conditions to pull the rotation information for me. That makes this a limited use technique, best reserved for items that are rotationally symmetric around the vertical axis, like a vase or lamp, or an object that should have a universal orientation like a sundial.
It might be of limited use, but they're simple exercises that will help you gain a better mastery of representativeTile's possibilities. It's also a completely new behavior, unlike anything the vanilla game has. So you're going to get some practice writing some raw autoTile logic.Project 2: Abusing representativeTile - Swapping Pots
So let's take these four vanilla pots and make them into one object, because carrying around four things is silly when we can carry one thing instead.Copy these puppies to your working folder.
..\content\staxel\plant\indoors\HydrangeaPot_small.tile
..\content\staxel\plant\indoors\InkwellPot_empty_1.tile
..\content\staxel\plant\indoors\InkwellPot_empty_2.tile
..\content\staxel\plant\indoors\InkwellPot_empty_3.tile
Rename them to:
SwappingPot.tile
SwappingPot1.tile
SwappingPot2.tile
SwappingPot3.tile
Now open all four and change their codes to something appropriate based on your own naming conventions.
SwappingPot.tile will be our representativeTile, so just like you did in Project 1, give the other three files the correct representative tile line, and correct their buyable, catalog, and searchable entries.
 "pricing": {
   "buyable": false,
   "catalogueUnlockedFromStart": false,
   "sellPrice": 24,
   "value": 40
 },
 "searchable": false,
 "representativeTile": "mods.AutoTileTutorial.Exercises.SwappingPot", //Don't use my code or you'll get conflicts!
Make sure that SwappingPot.tile has the three tags set to true so you can access it from the catalog and creative menus. (They should already be good, but double checking never hurts!) Save everything and close it all except SwappingPot.tile.
Now to write the autoTileInfo. I'm not going to spoon feed you the instructions, I'm going to walk you through the thought process.
We start with the behavior: we want to switch tiles every time we rotate; we only have 4 tiles for the 4 rotations; and we don't actually care about what any of the blocks around us are or are doing.
So we'll need three tests and the fourth pot will be the default state. Go write that in for now, and leave the actual test conditions blank, but you can fill in results because you know what they need to be. Don't forget to add a rotation line so that the pots don't spin. They're symmetric objects so that doesn't really matter, but it's good practice.
I said we don't care what the blocks around the pot are doing but that's not entirely true. We still have to care a little. autoTile is entirely contextual and proactive. We have to give it something to look FOR or it won't work. We can't look for specific blocks because we want this object to work pretty much anywhere. Looking for specific categories of block is a better bet.
So: where do you put pots? On furniture, walls (blocks), and floors.
         "tileCategoriesToLookFor": [
           "block",
           "floor",
           "flooring",
           "furniture",
         ]
We can't look at the block we're holding. But we need some reference point to determine our relative rotation, and it should always be the same block so that we can be sure we're not getting inconsistent readings that would cause us to skip a tile.
The best choices for this are either the block above or below us. I'm aware the block above the pot is empty air. That empty air still has a rotation. But it's probably better if you check the block under you as that just sort of makes more sense to check since that's what the pot will live on. It will be more understandable to you and anyone else looking at your code.
That should give you what you need to finish writing the logic.
The pots you just made are included in the ../mods/AutoTileTutorial/Exercises/ folder. The files are named "SwappingPot#.tile.ANSWERS" Remove the ".ANSWERS" file extension to have them load into game and see them working. Search for "Tutorial" or "Swapping" in-game to find the block.
Project 2: Going Deeper
While the game calls it "rotation" (mostly because that's what it assumes you're using it for), you can actually think of the rotation states for this project as being more like a catalog with pages numbered 0-3 that you flip to to pick the pot you want to use. If you're using items that aren't rotationally symmetric you'll need to take rotation into consideration if you decide to treat an item this way.
To really take autoTile in new directions you'll definitely want to keep the catalog metaphor in mind. We'll use it in the future.
Project 3: Accepting and Rejecting Tiles - A "North" Oriented Sundial
A lot of what we're doing in this project will be using the same stuff covered in Projects 1 & 2, so I'll give you far fewer hints in the way of what to write in your autoTileInfo unless I'm covering a new topic. Expect to apply what you learned previously to do something that looks entirely new in the game. (Here's a hint: it's not much different at all. We're just recontextualizing it.)
Check the install folder for the AutoTileTutorial and copy this file to your working folder:
..\content\mods\AutoTileTutorial\Exercises\Sundial.tile
..\content\mods\AutoTileTutorial\Exercises\SundialKit.tile
Change the codes in your working files so you can work on a copy that won't impact the original.
What you've got here are starter files. There's a fully fledged sundial, and an unbuilt sundial that hasn't been put together yet. Now, we could put it into the game as it is. It works and it would be perfectly fine, but the important thing about a sundial is that it's always oriented toward the north (or south if you're in the southern hemisphere.)
Now, the game doesn't have defined compass directions that the player can see, but it does have an underlying orientation.Material blocks like wood, stone, or flooring cannot be rotated by the player and they always spawn into the same direction when the world is spawned.
So, there is an underlying order to the world that we can take advantage of, as long as we can control where our sundial is placed. So: if the sundial is placed on a material, we can control its rotation to always face the correct direction. But if it's placed on a tileObject then we can't be sure it will face the correct direction. Which means we'll need a default state to cover every block it could be placed on that isn't a material.
So the representativeTile needs to be the sundial kit because our default state has to be able to cover options we specifically can't look for. Remember, you must proactively search for a thing, simply rejecting things isn't enough for autoTile to work with. When you're designing an autoTile from scratch any item that "is all the rest of that stuff" needs to be your representativeTile.
Go ahead and set the representativeTile tag with the proper code in your Sundial.tile file, set the catalog, buying, and searching flags properly and then save and close it.
Pull up your SundialKit.Tile file and get to work on the structure of your autoTileInfo. We don't specifically know what our test cases are checking for yet, beyond rotation, but you can put in a placeholder for now, and sort your logic out.
I'll walk you through the thought process and let's see if you can't put it together:
We have a sundial we always want to face the same direction, no matter what the rotation our user has selected when they place the object over a valid tile. If they place the object on an invaid tile it should default to the unbuilt state.
We get the rotation of our object by checking the rotation of a valid tile.
Those two statements and your previous experience should let you figure out the logic you need to use to make a sundial that always points "north." If you can't figure it out, you might want to take a look at the Tutorial Rotational block's autoTile code.
For now you can write your test condition as:
"tileCategoriesToLookFor": [
 "block",
]
As long as you test it over a patch of grass or flooring (or check it over a cloud block when you want to see the default result) you'll be fine. Go test your project and once you have your sundial working we'll polish it up by making as sure as we can that it will only properly build itself on a material.
Back already with a working sundial? OK! Now we need to go do some research. Open up:
..\content\staxel\tile\
Practically every .tile in this folder is a material and is safe for us to put our sundial on. You don't have to look at every file (you ought to though), but you should spot check one or two files in each subfolder at least. Write up a list for yourself of any categories you see regularly. My list looks something like this:
block, brick, dirt, grass, stone, rock, floor, flooring, tile, fairy, dungeon,
path, pathing, carpet, wood, planks, leaves, leaf, tree, cloud, cobblestone,
sand, water, walls, plus all the colors.
Practically every single file you open will have the tag "block". Not everything that's a block is a material, but if we pick "block" as the primary thing we're going to look for then very few things will slip past us. But we should probably add a few more, because tagging things is annoying and some modders probably don't do the best job of it.
So what we're looking for are categories that are pretty much exclusive to materials. Fairy and Dungeon are bad categories to keep since there are a lot of things that can be termed fairy or dungeon that you wouldn't want to put a sundial on. Colors are also a terrible choice because colors could be used on anything. Water might be a material, but you also don't want to put a sundial on it.
dirt, grass, tile, tiling, floor, flooring, path, pathing, carpet, sand, walls, and cobblestone are all practically guaranteed to be something safe to put a sundial on. None of these are terms you'd expect to see applied to furniture or objects.
Stone, rock, wood, planks, leaves, leaf, tree and cloud are all troublesome. These might be materials or they might be descriptors of what a piece of furniture or object is made of or decorated with. But nearly all of them also use the block tag, so we don't have to keep those on the search list, and if there are a handful of blocks we know are slipping through our filter (like the cloud block) we can check for those independently if we really feel the need. Planks might be material-ish enough to slip through, as might leaves.
So our current search list is:
block, brick, dirt, grass, tile, tiling, floor, flooring,
path, pathing, carpet, sand, walls, and cobblestone.
Maybe leaves and planks. And definitely "staxel.tile.Cloud"
Now we need to go looking for things to exclude. Open up:
..\content\staxel\tileObjects\
Get to listing. Not everything, but anything that has a flat enough surface someone might try to put a sundial on it and has a tag that we've included in our list has to go. Additionally, any common category you see that you definitely don't want a sundial on, like "furniture" should be on the list. (Take note that the serverVillage does have a couple materials in it. Don't freak out when you open the Brick files in that folder until after you've opened the QB and realize it's a material and therefore safe.) Mine looks like this:
pallet, present, station, counter, surface, countertop, furniture, craftingStation,
decoration, door, window, building, container, storage, crate, box, display, ore,
shelf, post, table, bed, oven, chair, statue, fountain, stairs, frame, fence, bridge,
stall, stand, sign, totem, roof, roofing
staxel.tileObject.serverVillage.UpperWoodenFloor
staxel.tileObject.serverVillage.WoodBeamHorizontal
staxel.tileObject.serverVillage.exterior.LooseBricks
That seems like a lot of stuff, doesn't it? It is, but we're selectively choosing fairly common tags that we can't imagine ever wanting to put our sundial on so that it will blend better with any mods our users have. Most of those keywords will probably never trigger because most things won't actually have one of our permitted keywords and a forbidden tag. I've stayed away from tags like "plant", "mushroom", or "misc" because a crazy modder might very well put those tags on a material at some point. Heck, there already are materials using mushroom! And while Surf Cotton doesn't use "plant" it probably should have.
I've picked out those three specific objects for a reason: they fall into our scheme because they're weird edge cases, but they haven't got a tag that's easy and safe to deliberately exclude.
There is one set of related categories we need to consider. Roof, Roofing, Tile and Tiling. There are both materials and tileObjects that have these properties. Leif's shop roof, the plaza tiles, and the normal sloping roof sets, among other things are the problem here. Now we can make exceptions for a few items but that doesn't help us with mods. The real problem here is that roofing almost always has to go, but tiles could just as easily be paths or walls as they could roof.
This is one of those times where you just have to make a call. I'm personally going to allow tiles but forbid roofs.
You can't interleave LookFors and Rejects. If you have two "tileCategoriesToLookFor" with a "tileCategoriesToReject" between them, Staxel will combine all the LookFors and then apply the Rejections. Rejections run after both the Tile and Category checks.
So our filter requirements will look something as follows:
         "tileCategoriesToLookFor": [
           "block", "brick", "dirt", "grass", "tile", "tiling",
           "floor", "flooring", "path", "pathing", "carpet",
           "sand", "walls", "cobblestone"
         ],
         "tilesToLookFor": [
           "staxel.tile.Cloud"
         ],
         "tileCategoriesToReject": [
           "pallet", "present", "station", "counter", "surface", "countertop",
           "furniture", "craftingStation", "decoration", "door", "window",
           "building", "container", "storage", "crate", "box", "display",
           "ore", " shelf", "post", "table", "bed", "oven", "chair", "statue",
           "fountain", "stairs", "frame", "fence", "bridge", " stall", "stand",
           "sign", "totem", "roof", "roofing"
         ],
         "tilesToReject": [
           "staxel.tileObject.serverVillage.UpperWoodenFloor",
           "staxel.tileObject.serverVillage.WoodBeamHorizontal",
           "staxel.tileObject.serverVillage.exterior.LooseBricks"
         ],
Yours doesn't have to be identical to mine. Remember that autoTile is all about tradeoffs. Make sure you add this to each test so your filtering applies to each check.
It is left as an exercise to load up the compass mod, and then make your sundial face actual north based on the movement of the sun and not the default rotation.
Project 3: Going Deeper
This project really covered two topics: cheating with rotation, and using lookfors and rejects to filter your conditions.
As far as cheating with rotation goes: this is a pretty useful technique. You could use this to orient decorative caps on the stone fences or roofs, or really anything where you know that your object should always be placed in an orientation relative to the tested block. That's what you're actually doing with the sundial. Orienting with a specific block, not just orienting with the game's arbitrary north. We were just taking advantage of a quirk in the game. If material blocks could be rotated the sundial would have been impossible. Pay attention for quirks like that when you mod. They can lead you interesting places.
As far as filtering goes: this is probably my biggest complaint with autoTile. It insists on having a block or category to check. Even if we really only care about the rotation of the block we're on, not what it is. But we are kind of trying to cheat the system on this one. Get used to doing your research on vanilla files. Make yourself a test world with objects and materials lined up in rows so you can check your filter conditions. Even then, something's always going to break somewhere. None of this will be perfect. We can only shoot for "good enough."
Looking at Tiles Farther Away
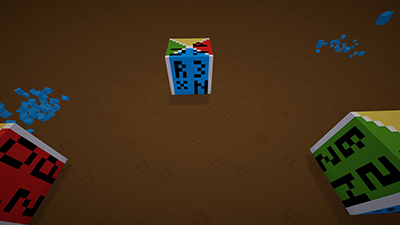
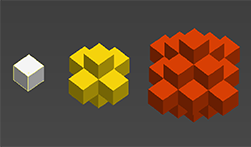
Now, up until this point we've been keeping our tests to the immediate area, just looking up, down, right, left, front or back, like in the small yellow octahedron in the image. Your center tile (The one you're placing, white in the image,) is the origin point Staxel uses to decide where the "eyes" of the tile are.The majority of your tests will probably be in this range. It's easy to keep track of, and usually you'll just want to check a neighboring tile. Sometimes, however, you'll need to go farther afield, either to place your items, or to check a distant tile.
"secondDirection": "",
Is how you go one direction farther to get to the orange octahedron. It uses the same directions as:
"direction": "",
Bear in mind that to get to any diagonal point you're going to have to use a stair-stepping method to get there, which is why you can't just go out a full cube of distance but have to settle for the octahedron.
Another thing to note is that once you're working with the second direction: there are multiple ways to get to some points. Going "left" and then "down" is the same as going "down" and "left". Be consistent and methodical in your choices for how you pick a direction to look; say, always preferring "front" and "back" before "left" and "right" and both of those before "up" and "down". You'll write much less confusing autoTiles that way, and be less likely to have strange errors you can't hunt down.
One last thing to bear in mind about those octahedrons: you're basically always starting from that center white cube. if you're just using "direction" you can't look from the left cube of the yellow octahedron to the right cube. You always start at the center.
lookFromOverride is currently bugged.
 The remainder of this section is helpful in the theoretical sense only
 at present. It's staying here for the moment, but some of the info might change.
The red octahedron is obtained by using:
"lookFromOverride": "",
Which could just as easily been called "thirdDirection." What it really does is shift the point of origin in any one of the six directions, and the red octahedron is the composite of all six orange octahedrons. Again, be aware that when using lookFromOverride "direction" still only has access to the usual six locations, and "secondDirection" will also only be able to go the usual six as well.
I want to stress: the larger two octahedrons are only the summed potential locations you can reach. Every step you take will reduce your ultimate options, but that's what you want to do anyway.
Several of the upcoming projects will make use of some of these extended directions, so spend some time wrapping your head around navigating like this. Pull out an old rubik's cube or sketch on some paper until you have a handle on how it all works.
Project 4: secondDirection and Making New Tags - Painting With English Ivy
This section is under construction. The tutorial mod has not yet been updated with this project.
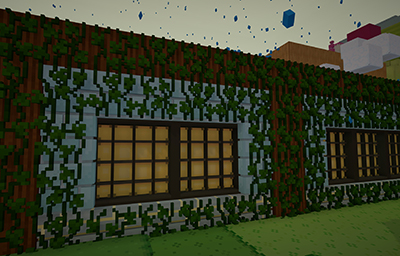
The vanilla game actually has a bit of Ivy in it, and not just the vines you usually see. It doesn't work very well in the vanilla game, so I've pulled it out and fixed it. Of course, the major feature of English Ivy is that it just flat up eats houses, so a single small vine creeping up the wall just doesn't look right.
Now, building a house is bad enough, building an entire extra wall of ivy outside of it? Ugh. Let's save ourselves some carpal tunnel shall we?
Go ahead and copy:
..\content\mods\AutoTileTutorial\Exercises\Ivy.tile
..\content\mods\AutoTileTutorial\Exercises\Ivy1.tile
..\content\mods\AutoTileTutorial\Exercises\Ivy2.tile
..\content\mods\AutoTileTutorial\Exercises\Ivy3.tile
to your working folder. Make sure you change these entries to something new.
"code": "",
"representativeTile": "",
All good? Cool.
The idea here is that we want to place a whole bunch of tiles at once, but we still want to be able to create single tiles when we need to. So we need a marker system to indicate to the game that we want "this area" to basically be flood filled with ivy. A little plus shape of ivy is okay, but it's an awkward shape, a square would be a lot better. You've already read about the orange octahedron that using
"secondDirection": "",
will get us to. The largest slice of that shape we can get onto a flat wall is a big diamond shape that's five blocks tall and five blocks wide. The center of that makes a very nice 3x3 square. That leaves us with the four outer points of the diamond to use or ignore as we like.
We could put our markers inside the 3x3 square. But we're trying to save on clicks, so let's not waste putting our markers into the same area as our flood fill. Let's pick the top point and consider what would happen if we just used a single point as our marker. Any time our marker tile is two blocks above our cursor we'll get a flood fill. That's a pretty common circumstance. It could make our attempts to do detail work a little difficult. The same would happen if our marker tile were a single tile in any direction.
So let's use a pair of them. The far Left and Right tiles might be nice to use, but there'll be some cleanup around the corners to do because we won't be able to overflow off the edge of the building if we use those tiles for markers, but a lot of roofs in Staxel are pointed so we could fill everything if we used a vertically oriented set of marks. So, top and bottom it is. We'll still have to fill in a little, but it will be a lot less than otherwise.
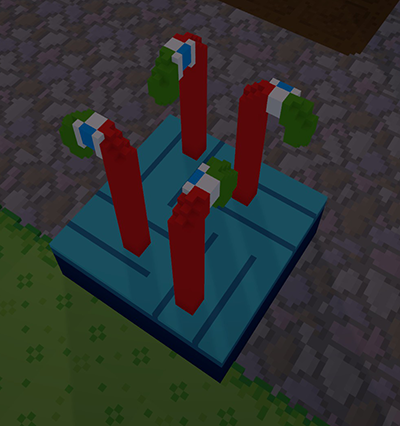
Now the Ivy.tile file already has code in it that lets it stick to a wall. You can also rotate through all four ivy variations.
It is left as an exercise to the reader to add in the left and right marker pair to make the ivy a more flexible tool.
Project 4: Going Deeper - Wall Tiles
Wall tiles have some unique considerations because of how they react to rotation. If you drop down a fence piece and rotate it, you'll see that it spins around the vertical axis. Now, mentally picture how that works if you apply a wall tile to the face of the cube you're rotating. It moves and basically rotates into the wall, and then onto the back side of the wall if you go farther.
Now, any tile we apply will actually be applied to the tile in front of that wall block, but the same problem applies. If we try to rotate the block that a wall tile is in, it will move and lift away from the surface to float in mid-air. This is great if you have a wall lamp that just needs to stick to a wall. It doesn't change shape, just rotation. The second you want to add variety of appearance into your wall tiles you need to start leveraging your rotation to start solving two different problems at once.
If you think back to the sundial project you'll remember that we wanted to make sure that no matter which direction we rotated our object we always wanted it to be oriented the same direction. That's also exactly what we needed to do with our ivy! Let's see how that solution helped make our starter ivy file.
Pull up the original SundialKit.Tile, not the one you worked on. The finished version has a massive mess of tile categories to check that we really don't care about.
Now compare the autoTile in your sundial with the autoTile in the pre-provided Ivy file.
That looks ridiculously similar doesn't it? It is in fact, the same code, barring the fact that for each rotation we're calling a different tile to place instead of the same sundial tile. That's why I didn't go over it in the main tutorial. You'd already done it.
This might be my favorite example of just how differently the same underlying autoTile logic can appear with just a different perspective on things. It still blows my mind a bit.
Oddly, this is also behaving almost exactly like our Swapping Pots tile swapping catalog too. But on that project we didn't care a bit about rotation because the pots were rotationally symmetric.
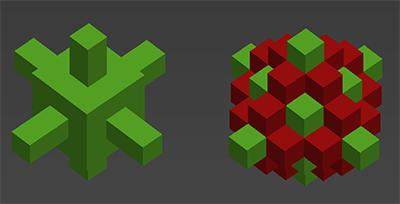
So: How did we go from a non-rotating sundial to flipping through a catalog of flat wall tiles? Now, we could have gone the sundial route, and just used one single tile over and over, for everything. The problem is, that gets visually repetitive really quickly. That's fine for ceramic tiles, but not so fine for organic vines. Remember what I said earlier about changing visual appearance? We want the visual interest of a rotatable tile like this:
but we can't use that, because then we'd have a full three sides of ivy hanging out in mid-air. So our four tiles each have one side of that theoretical ivy cube, and the setup effectively only makes one side of our cube visible at a time.
Think about how you'd go about making those four sides of that theoretical ivy block into four QB files, one for each face. Would it look something like this? Go open up the QB files for our ivy and take a look at them.Now you could do the rotated Ivy tiles. There's nothing wrong with them. But un-rotated tiles takes advantage of the Ego-Centric Relative rotation scheme that autoTile functions under. If you just paint all your art as if you're facing front, and then apply that tile with the known fixed rotation of a material block that you just checked, autoTile will do the math for you. All you have to remember is that Ivy2 has "rotation": 2 every single time and you're golden!
You don't have to take my word for this. This is another really good exercise to use to wrap your head around how rotation works in the game. Spend some time making a copy of your ivy tiles and QBs. Adjust the rotation of the QBs to the orientations you'd have expected and then spend some time messing about with the tile file to really harden up your understanding of how this works.
Project 5: Fixing the Arched Window
This will revisit the catalog metaphor on a larger scale, as well as using some lookFromOverride to check out what blocks the Arched Window should really be on top of.
Project 6: Bag of Mixed Flower Seeds
We'll be looking at making a special bag of flowers for your lawn. Topics will cover checking multiple directions, placing multiple directions, and possibly alts.
Project 7: Cecile's Beaker of Acid
This will cover using autoTile to break out some materials and blocks.
Master Project: Roof and Fence Systems: Going Deeper
Finally! This is the sort of thing you're all here for, right? Making your own fancypants fence!
You poor fool. Go use one of the vanilla fences. Or mine. Don't do this to yourself. You insist? The original modding tutorial teaches you how to make stairs, it's basically the same thing.
No? You really insist? Fine. Go read the stairs tutorial first. I'll wait.
You back? Alright, if you actually understood all of that after the grounding I gave you with the other stuff, you're good to go. With what that tutorial gives you, making a fence system is just a matter of expanding the principles they showed you.
If you didn't understand it, or you're confused about how to expand on it, that's what I'm going to cover here. I'm not going to show you how to code a fence. You know all the pieces to do that. I'm going to show you how to organize a fence on a conceptual level and create a map of how a fence behaves. Basically, you got the project stuff from the original tutorial. This will all be theory and methods I used to figure out how fences work and how to work on them.
Now you can have a bunch of tiles made into an autoTile block, but that doesn't make them a system. Systems, be they fences, or hedges, or roofs, or stairs are a network of tiles that are designed to be interconnected with each other so that they look like one single object. Some of these objects (like the tall green hedge in the vanilla game, or all three blue roof blocks) are made from multiple blocks, but your brain will lump them all into the same group. We've played with autoTile at the tile and block levels. Now we're playing at the object level.
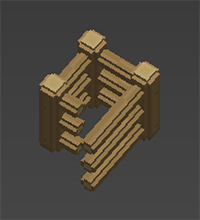
So the first thing I'm going to toss at you is a new concept: the Attachment Point. This is any side of a tile that is designed to connect to another tile in the object. So on that fence in the picture, the sides that have little bars jutting out are the attachment points. This isn't something you have to define in the logic with a special code or anything. These are the faces of the object that you are defining as interactive based on how you build the logic.
As far as Staxel is concerned one face is as good as another. These are restrictions you're placing on yourself.
Let's make a simple, hypothetical fence. I'm not going to make you code here, but you can do that while I cover this if it will help you. The tutorial fence was made just for this purpose so go ahead and use those pieces. A fence at it's most basic is a rectangle with straight sides and corners. So we'll need two pieces: the straight piece and the corner piece. Each of these pieces has two attachment points, but they're in different locations.
So you'll probably start, as staxel does, by placing a straight piece. Then you'll move over one square and the autoTile logic will kick in. There's a straight piece behind me. I'll offer you another straight piece. You rotate the block. There's a straight piece to my left. I'll offer you a corner. You rotate the block. There's a straight piece in front of me. I'll offer you another straight piece. You rotate the block. There's a straight piece to my right. I'll offer you a corner. If you rotate one more time the logic will loop.
That interaction between where a placed tile is located and what tile is offered as an answer to that context is a Connectionin your autoTile logic. There's a test condition that says "straight piece to the right" and the associated result says "offer corner piece." This is also a one way connection. You could write your logic so that a corner piece only ever attaches to another corner piece.
Following that isn't all that hard, but then we need to factor in attachment points and rotation: in the image you can see that while the corner is to the left (as the straight block sees it) of the straight piece, only one of these connections is properly taking attachment points into account.
Now you could write all the logic by asking yourself "what is the tile I'm placing seeing in each and every circumstance?" Trying to take that perspective got me very confused very quickly and it's extremely easy to get lost when doing this. It's much simpler to ask "what tests do I need to be looking for?" and to do that you have to flip the question around: "what are all the conditions that this tile can be in that I could possibly write a test case for?"
Rule #1 of a System: a tile can't connect to more than four times the number of attachment points it has. It should probably not connect to less than that either, unless you're going to the default tile.
Rule #2 of a System: An attachment point can accept an infinite number of connections. That's a bad idea in general, but you can have five or ten tiles all connecting to the same attachment point if you really want to.
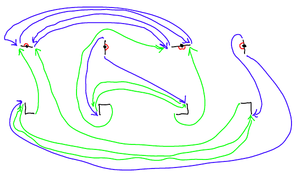
I highly recommend that you actually sit down and draw out your autoTile system. It will help you make sure you don't have dead ends or looping traps where you don't want them. When you make a map it's easier to break it out so each rotation of a tile has its own version. That way it's obvious which rotation of a tile you're dealing with.
Each arrow in the map is one test condition leading to one result. For example, at the upper left we have a straight piece at rotation 0. If it's to my left side when I make a check I follow the blue arrow to the straight piece with rotation 2. When you draw a map like this every attachment point should have one arrow leading away from it.
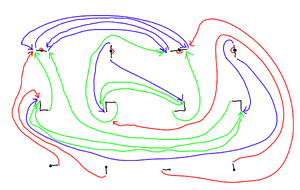
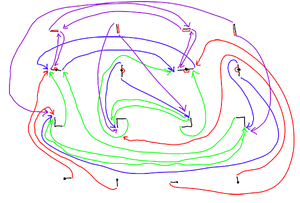
Now, you don't just draw a map like this willy-nilly. (Even though I did offhand this so there might be some minor errors or inefficiencies.) You give yourself rules for how things need to connect. Every straight attachment point has four connections. Two of those need to go to corner pieces (that lead in different directions) and two need to go to straight pieces. That was one of my rules. Corner Pieces had to do the same thing. That rule gives you the nice rotational cycle of corner to the left, straight, corner to the right, straight.After this, you translate this map into a list of instructions arranged by the piece you're testing and then plug that list into your autoTileInfo. (I'm aware that this might seem like an utterly insane, tedious way to do this. It's also the way that worked for me the first time I tried it. Once you have a better handle on the mental ideas you need to use to make a fence you might not need the map... but when you're dealing with six fence pieces it's just flat up madness and I can't imagine anyone holding that all in their head.)
Let's add in the end piece to our map, because maybe we want our fence to have a nice hole in it to walk through.
Now that looks weird doesn't it? In fact it almost looks like I just deliberately put a dead end into that map. I did. The end piece has been designed to be my starting piece. It won't always be, because my conditions won't always be valid, but the circumstances to using it are pretty simple and fairly likely to be found around the end of a fence. There has to be empty space around three sides.
If you ever need to test for a completely empty tile, test for "staxel.tile.Sky".
This does mean that if you want your fence to have two end pieces that you'll have to start with the ends and join them up in the middle... but writing an autoTile is all about compromises.
I could have broken into the loop that the straight tile has with itself and linked back to the end posts instead, and if you're going to keep your fence at this level of complexity that's not a terrible idea. But ultimately I broke into that loop to insert the middle piece instead.
I've broken into the straight piece loop here and spliced in the middle piece. You can get more complicated than even this. The stone fence in my mod contains a second middle piece that's actually directional. (That was a stone cold beast.) Getting more complicated than this is really not advised.
Note that this is again just mapping out the general principles. Some of these arrows are different in the final tutorial fence. The final fence actually has some tweaks made to the looping patterns between the straight and middle pieces to allow the creation of different placement patterns based on the orientation of the fence piece you're next to. Go map that out yourself if you want to play chicken with that aneurysm.
Up until this point we've just been working off testing for a single block to inform us of our next piece to place. We can't do that anymore. We still haven't looked at the T-Section and Cross pieces.
Now, if you look at the autoTile for the standard "Small Wooden Pole Fence" in the vanilla game, you'll find that they go straight from the very first map into tests for the T-Section and Cross. Which causes no problems for the auto tile logic.
But if you pull up the "Wooden Pole Fence" that middle piece causes some conflicts if you build just the wrong shape. As we are working with a middle piece, we'll need a check to patch that error. The check is similar to the checks you'll do when you do a T-Section check or a Cross section check so I'm going to cover them all at once.
All three cases can really just be considered override patches on the basic behavior of the system. You want a patch to be as unobtrusive as possible. It doesn't have to apply for every rotation, it just needs to work for one of the four rotations. (But it might work for more! Depends on what you're patching.)
This is where that whole "directionsToLookIn"-is-a-list comes into play.
   {
     "directionsToLookIn": [
       {
         "direction": "back",
        "rotationToLookFor": 2,
         "tilesToLookFor": [
           "mods.AutoTileTutorial.EFSmallWoodenPoleFenceCorner",
           "mods.AutoTileTutorial.TutorialFenceCorner"
         ]
       },
       {
         "direction": "left",
         "rotationToLookFor": 0,
         "tilesToLookFor": [
           "mods.AutoTileTutorial.EFSmallWoodenPoleFenceCorner",
           "mods.AutoTileTutorial.TutorialFenceCorner"
         ]
       },
     ],
     "results": [
       {
         "direction": "none",
         "rotation": 3,
         "tileToPlace": "mods.AutoTileTutorial.TutorialFenceCorner"
       }
     ]
   },
You can check more than one direction at once by making a list of blobs that each check a different direction. For a Corner check you test two directions, for a T-Section you check three, For a cross you check all four.
And that's pretty much it. That's the thought process behind building a big, complicated fence system.
It is left as an exercise to the reader to generalize the tutorial fence from checking for specific tiles to checking for tile categories.
Congratulations!
You made it! You're done! Go make awesome mods now!
