Difference between revisions of "User:Toketsupuurin/MaterialTutorial"
(Created page with "==Voxeling a Material:== '''First:''' You really only need to build yourself the standard tile cube. '''The material converter is a much better way to go about actually build...") |
(→Voxeling a Material:) |
||
| Line 4: | Line 4: | ||
This is rather slap-dash, but it should give you a working understanding of the concepts. | This is rather slap-dash, but it should give you a working understanding of the concepts. | ||
| + | |||
| + | ===I'm going to repeat this: This is the HARD way. Use the Content Builder!!=== | ||
If you want to edit material tiles you need Qubicle. It's the only voxel editor that properly handles the massive size of the files. The black bits you find in some material tiles just indicate that that's an interior bit and won't/shouldn't ever be visible. | If you want to edit material tiles you need Qubicle. It's the only voxel editor that properly handles the massive size of the files. The black bits you find in some material tiles just indicate that that's an interior bit and won't/shouldn't ever be visible. | ||
| Line 10: | Line 12: | ||
[[File:Material1.png]] | [[File:Material1.png]] | ||
| + | |||
| + | Everything in the material file lives and dies by the internal grid structure. Each of the white grid squares is 8 voxels. Every single part of the material file lines up with a 16^3 core block. You live and die inside this grid. If you're off by a single voxel your material's tiling will break somehow. | ||
| + | |||
| + | [[File:Material2.png]] | ||
| + | |||
| + | Material Tiling is set up so that every possible placement combination of tiles in the game that the game cares about has a sub-tile that it can use to take into account how two connected blocks should tile. I've named the arrangements here, but the blue wood file will give you a better idea of each layout. The purple grass shows you where the critically important chunks live. | ||
| + | |||
| + | [[File:Material3.png]] | ||
| + | |||
| + | There are some broken blocks in the game you can play with to get an idea of the limits of the system. "staxel.tile.wood.SequoiaWood" is missing all of its sub-tiles and only has the root tile. Cheat yourself some of those and see what happens in game when you place down blocks of it. "staxel.tile.retrotest.dungeon_floor" is a 32^3 block. Using it is incredibly confusing. I still haven't figured out how certain tilings cause the results they do. NEVER MAKE YOUR ROOT BLOCK BIGGER THAN 24^3. | ||
| + | |||
| + | So! Let's get into how to make a material block: Step 1 is finding a block in the game that's the rough size and shape you want to work with. If you want to make a floor, grab a floor block. grass? grab a grass block. This is going to act as a reference skeleton so you know you're generally getting things placed properly. | ||
| + | |||
| + | I picked "staxel.tile.dungeon.DungeonWall" for my first block because I wanted candy cane trim on my gingerbread house. I'm an incredibly foolish person. Don't make my mistake. But that's what I've got made so I'm going to use that for my example! | ||
| + | |||
| + | [[File:Material4.png]] | ||
| + | |||
| + | Grab the Root block of your guide and pop it out into its own matrix. Resize the matrix to be 24^3 MAKE SURE it's positioned in the exact same way as the original block is in the invisible 16^3 grid. The tile I chose has 1 voxel bumping down lower than the rest of the block on the trim bits. There should be 4 voxels on all 6 sides of where your core is. (You don't need to shrink down to see your core. you want the 24^3 size to work with.) | ||
| + | |||
| + | [[File:Material5.png]] | ||
| + | |||
| + | You'll notice that when I shrink down to the core I loose a voxel on most sides. These are the actual sub-tiles the game uses to make up grass and dirt. The core is never seen unless a face sub-tile is empty or partly empty. in this case my top face is empty so my core is visible. Your core should always be solid, or virtually so. The game does have a few blocks with non-solid cores but they're very old and not standard. Don't put holes in your core. | ||
| + | Now, a very important thing to be aware of when designing a block is that it doesn't matter what size your block IS, you're always going to design your tilable portion around a 16x16 square of voxels. Here's why: | ||
| + | |||
| + | [[File:Material6.png]] | ||
| + | |||
| + | This is what your block actually looks like to the game. (The top and bottom faces would be blown off too and there'd be little cubelets in the corners if I'd picked a taller block.) Every block is made up of at 27 sub-tiles in theory. (I've never been able to figure out if it divides them smaller than that or not. It might.) You're seeing 9 of them right now because my block isn't tall enough to create the top and bottom slices (it's technically tall enough to create a bottom slice but it's one voxel high and you get the idea.) | ||
| + | |||
| + | Each of those faces are 16x16. They will always be 16x16. plan accordingly. | ||
| + | If I have a wall of three blocks wide and 1 block deep and 1 tall the game says "Ah! I know what to do! I'll repeat the middle bits and stick the end bits on last!" | ||
| + | And you get this: | ||
| + | |||
| + | [[File:Material7.png]] | ||
| + | |||
| + | So. go off and make your block. I wound up with this: | ||
| + | |||
| + | [[File:Material8.png]] | ||
| + | |||
| + | So the really important bit is taking that block from there to this: | ||
| + | |||
| + | [[File:Material9.png]] | ||
| + | |||
| + | Just use the content builder. I beg you. Don't do this manually. Use the content builder and then edit the result by hand. This is super tedious. You really want to try? Ok. Let's make the Star. You'll want to take your blocks and arrange them into the general shape of the bit you're working on. Then trim the matrices so that you cut off any face that won't be seen. | ||
| + | |||
| + | [[File:Material10.png]] | ||
| + | |||
| + | Now stick them together and make a union out of them. | ||
| + | |||
| + | [[File:Material11.png]] | ||
| + | |||
| + | In a ton of cases you're going to be done right now. If you just have solid square blocks this might be all you need. But I've got those weird candycanes and they take extra consideration. You have to decide what bits don't look nice and don't work the way you want your block to work. | ||
| + | This is why it's really important to choose a good block template for yourself. Referencing how the dungeon block works in vanilla, I know that if I make my candycanes the same shape and placement as the vanilla dungeon block then my block will work properly, even if bits of it seem really strange to me. | ||
| + | So I reference the dungeon tile and realize that the outer candycanes aren't important here, it's just those inner corners this bit cares about. I do a little editing to fill in bits that are missing and take out parts I don't need and call this chunk done. | ||
| + | |||
| + | [[File:Material12.png]] | ||
| + | |||
| + | Once you've got all 9 chunks done, line them up according to your guide skeleton, merge them all together and resize the bounding box to the skeleton's size. Make sure everything lines up with the core placements and make adjustments if you messed up. It's a right royal pain. | ||
| + | Notice that if I hadn't trimmed my core block in the middle I wouldn't have had to replace those bits of candy cane. But it can be hard to know what to keep and what to toss until you really have the concept of how this works in your head. | ||
Revision as of 17:04, 11 June 2020
Voxeling a Material:
First: You really only need to build yourself the standard tile cube. The material converter is a much better way to go about actually building a material. I did it the hard way because I am clueless. But if you want to edit a material's joins for some reason, or you just want to know more about how a material is put together this will cover the basics.
This is rather slap-dash, but it should give you a working understanding of the concepts.
I'm going to repeat this: This is the HARD way. Use the Content Builder!!
If you want to edit material tiles you need Qubicle. It's the only voxel editor that properly handles the massive size of the files. The black bits you find in some material tiles just indicate that that's an interior bit and won't/shouldn't ever be visible.
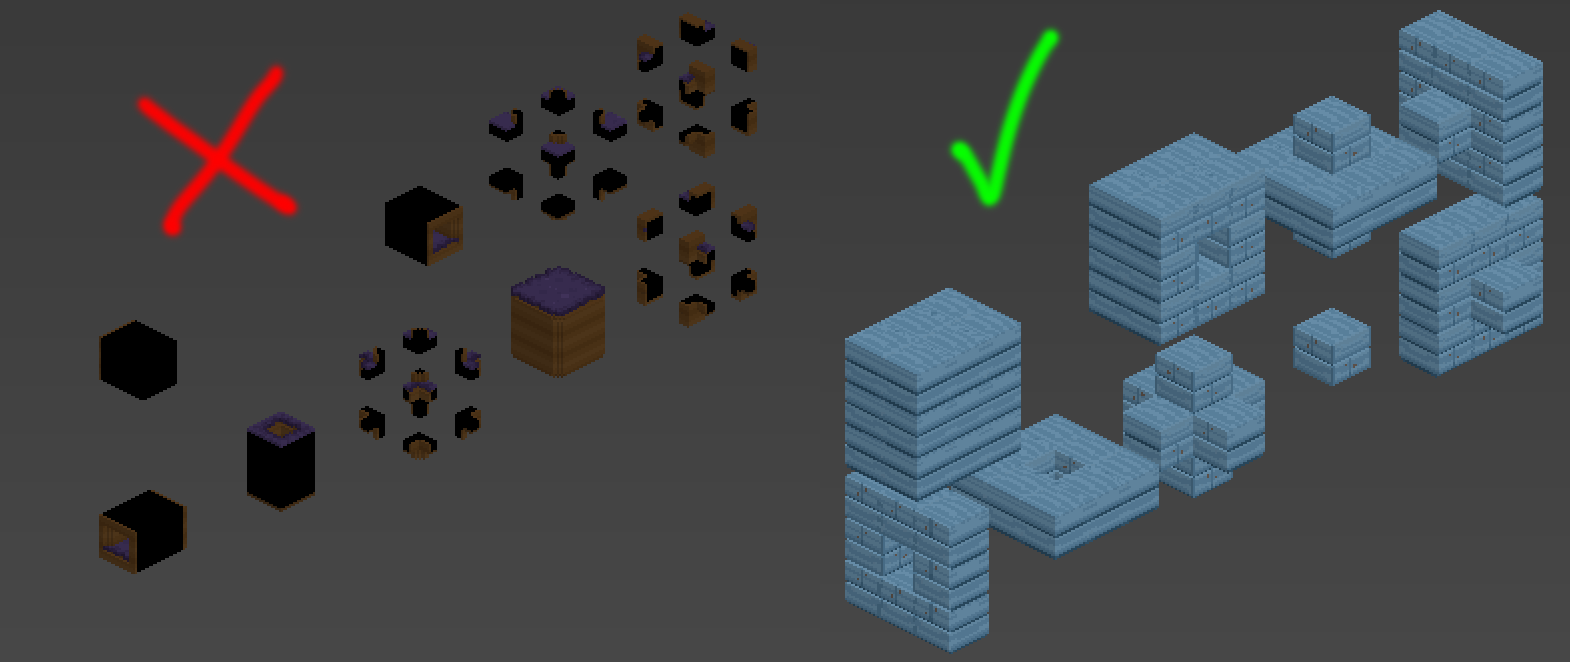
Rule #1: Material files laid out like the blue wood are good. They tile properly without errors. Material files laid out like the creepy grass are bad. They have tiling issues. (But they're great for understanding how a material tile is laid out and where important bits are.)
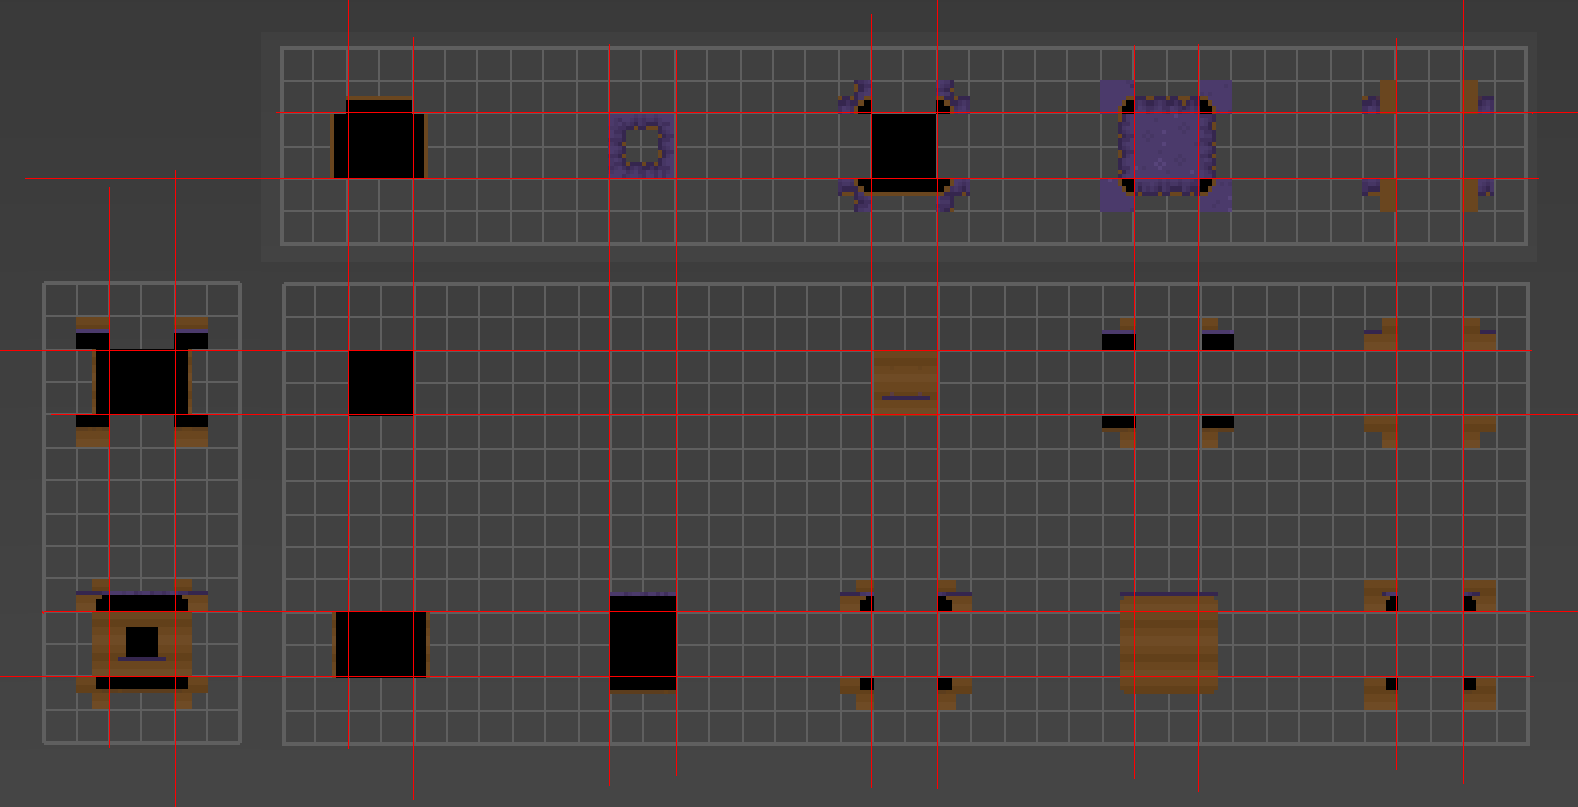
Everything in the material file lives and dies by the internal grid structure. Each of the white grid squares is 8 voxels. Every single part of the material file lines up with a 16^3 core block. You live and die inside this grid. If you're off by a single voxel your material's tiling will break somehow.
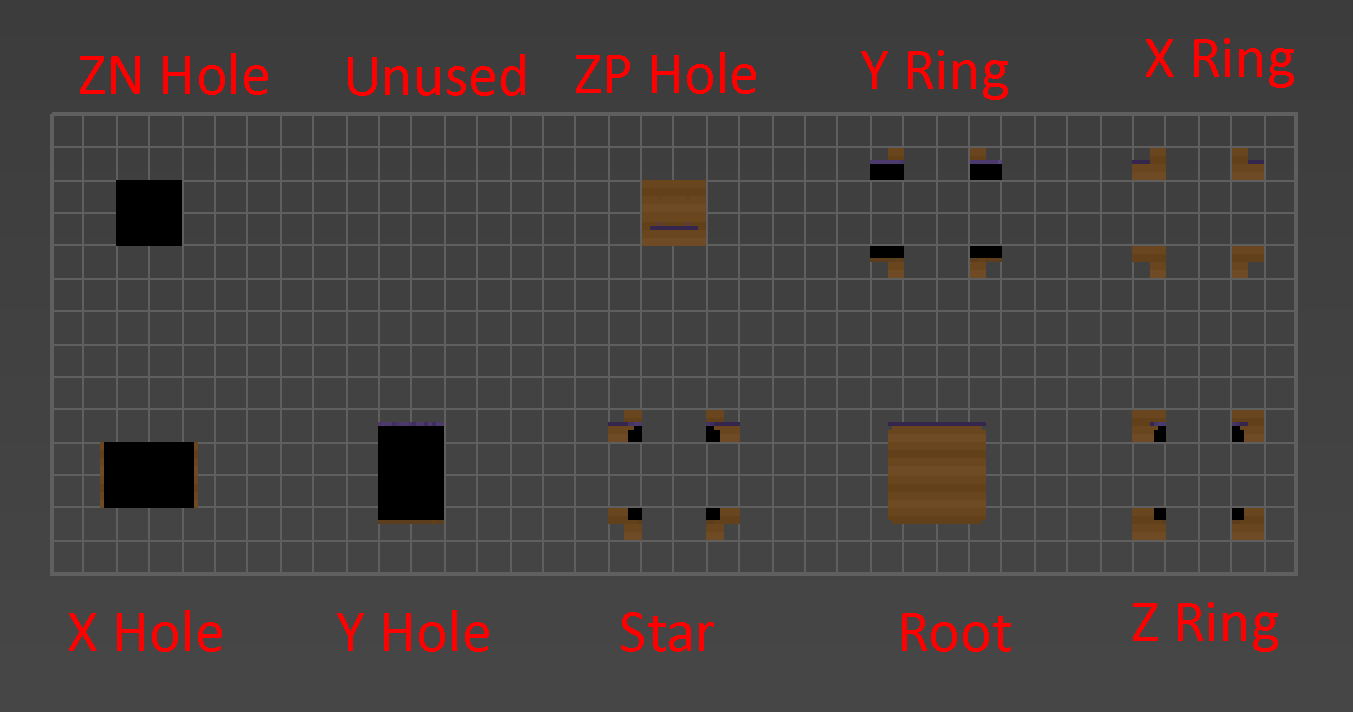
Material Tiling is set up so that every possible placement combination of tiles in the game that the game cares about has a sub-tile that it can use to take into account how two connected blocks should tile. I've named the arrangements here, but the blue wood file will give you a better idea of each layout. The purple grass shows you where the critically important chunks live.
There are some broken blocks in the game you can play with to get an idea of the limits of the system. "staxel.tile.wood.SequoiaWood" is missing all of its sub-tiles and only has the root tile. Cheat yourself some of those and see what happens in game when you place down blocks of it. "staxel.tile.retrotest.dungeon_floor" is a 32^3 block. Using it is incredibly confusing. I still haven't figured out how certain tilings cause the results they do. NEVER MAKE YOUR ROOT BLOCK BIGGER THAN 24^3.
So! Let's get into how to make a material block: Step 1 is finding a block in the game that's the rough size and shape you want to work with. If you want to make a floor, grab a floor block. grass? grab a grass block. This is going to act as a reference skeleton so you know you're generally getting things placed properly.
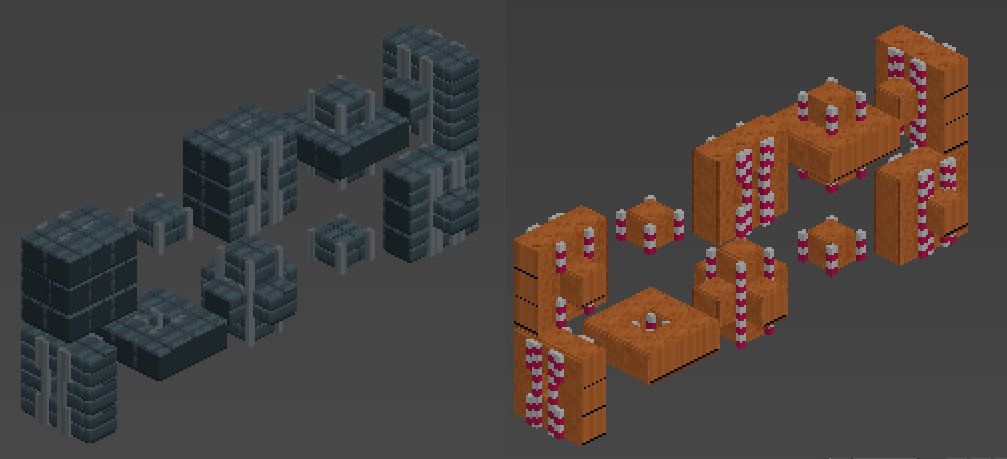
I picked "staxel.tile.dungeon.DungeonWall" for my first block because I wanted candy cane trim on my gingerbread house. I'm an incredibly foolish person. Don't make my mistake. But that's what I've got made so I'm going to use that for my example!
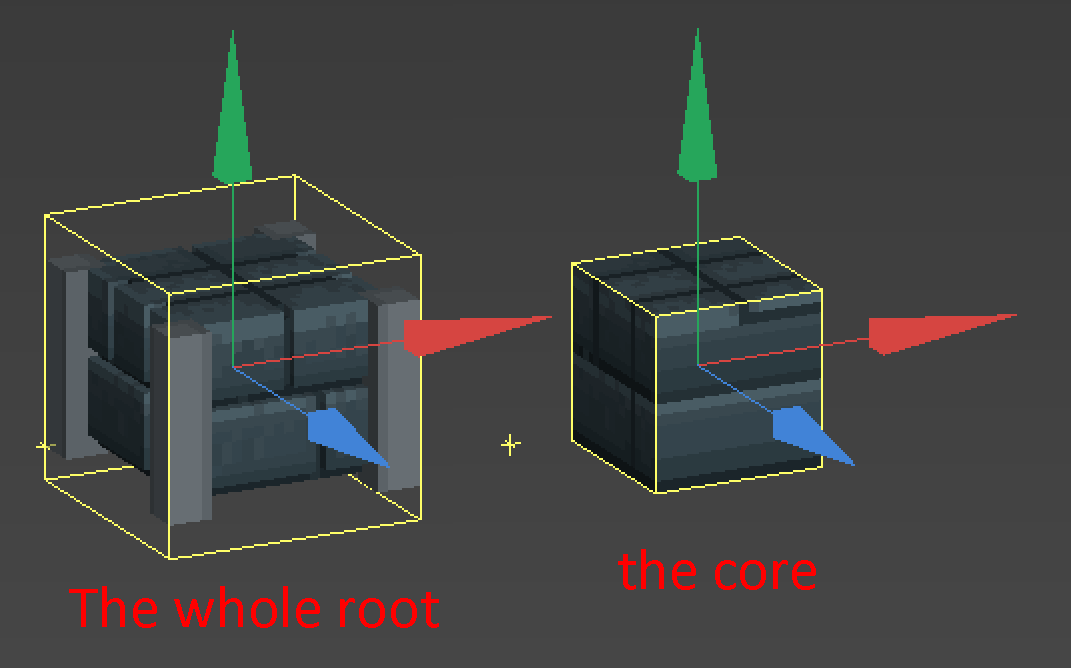
Grab the Root block of your guide and pop it out into its own matrix. Resize the matrix to be 24^3 MAKE SURE it's positioned in the exact same way as the original block is in the invisible 16^3 grid. The tile I chose has 1 voxel bumping down lower than the rest of the block on the trim bits. There should be 4 voxels on all 6 sides of where your core is. (You don't need to shrink down to see your core. you want the 24^3 size to work with.)
You'll notice that when I shrink down to the core I loose a voxel on most sides. These are the actual sub-tiles the game uses to make up grass and dirt. The core is never seen unless a face sub-tile is empty or partly empty. in this case my top face is empty so my core is visible. Your core should always be solid, or virtually so. The game does have a few blocks with non-solid cores but they're very old and not standard. Don't put holes in your core. Now, a very important thing to be aware of when designing a block is that it doesn't matter what size your block IS, you're always going to design your tilable portion around a 16x16 square of voxels. Here's why:
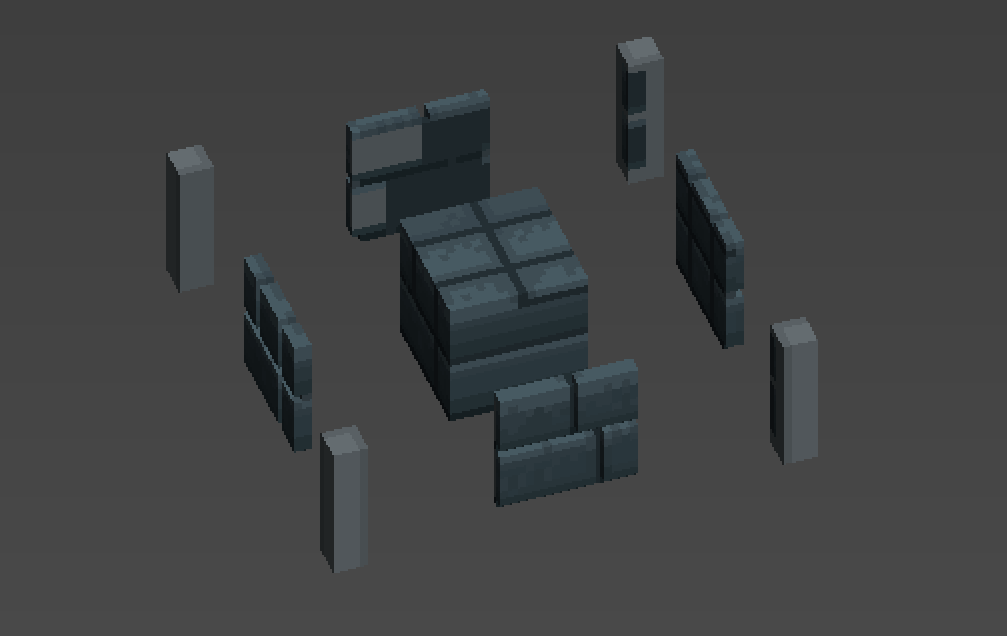
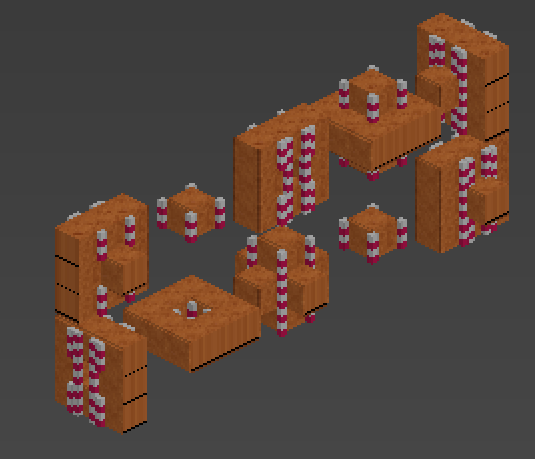
This is what your block actually looks like to the game. (The top and bottom faces would be blown off too and there'd be little cubelets in the corners if I'd picked a taller block.) Every block is made up of at 27 sub-tiles in theory. (I've never been able to figure out if it divides them smaller than that or not. It might.) You're seeing 9 of them right now because my block isn't tall enough to create the top and bottom slices (it's technically tall enough to create a bottom slice but it's one voxel high and you get the idea.)
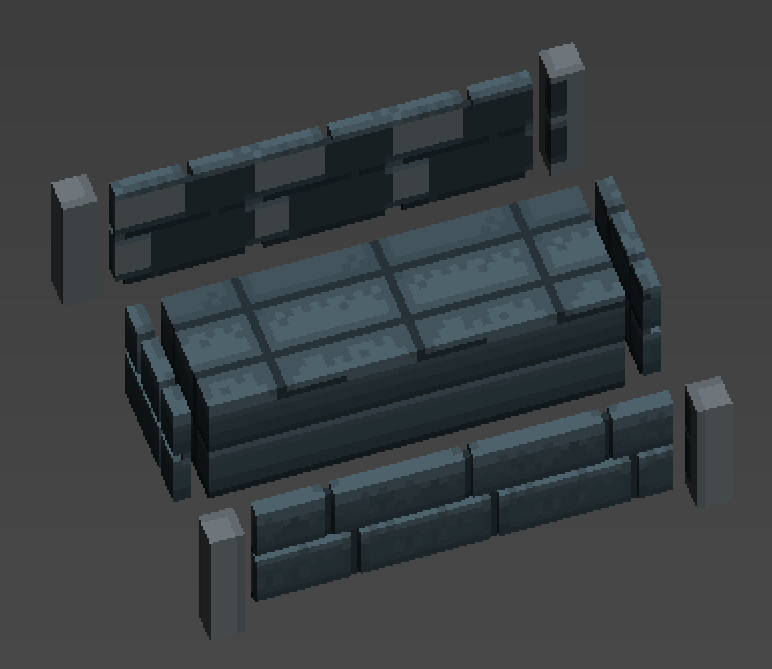
Each of those faces are 16x16. They will always be 16x16. plan accordingly. If I have a wall of three blocks wide and 1 block deep and 1 tall the game says "Ah! I know what to do! I'll repeat the middle bits and stick the end bits on last!" And you get this:
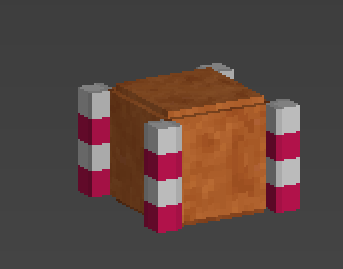
So. go off and make your block. I wound up with this:
So the really important bit is taking that block from there to this:
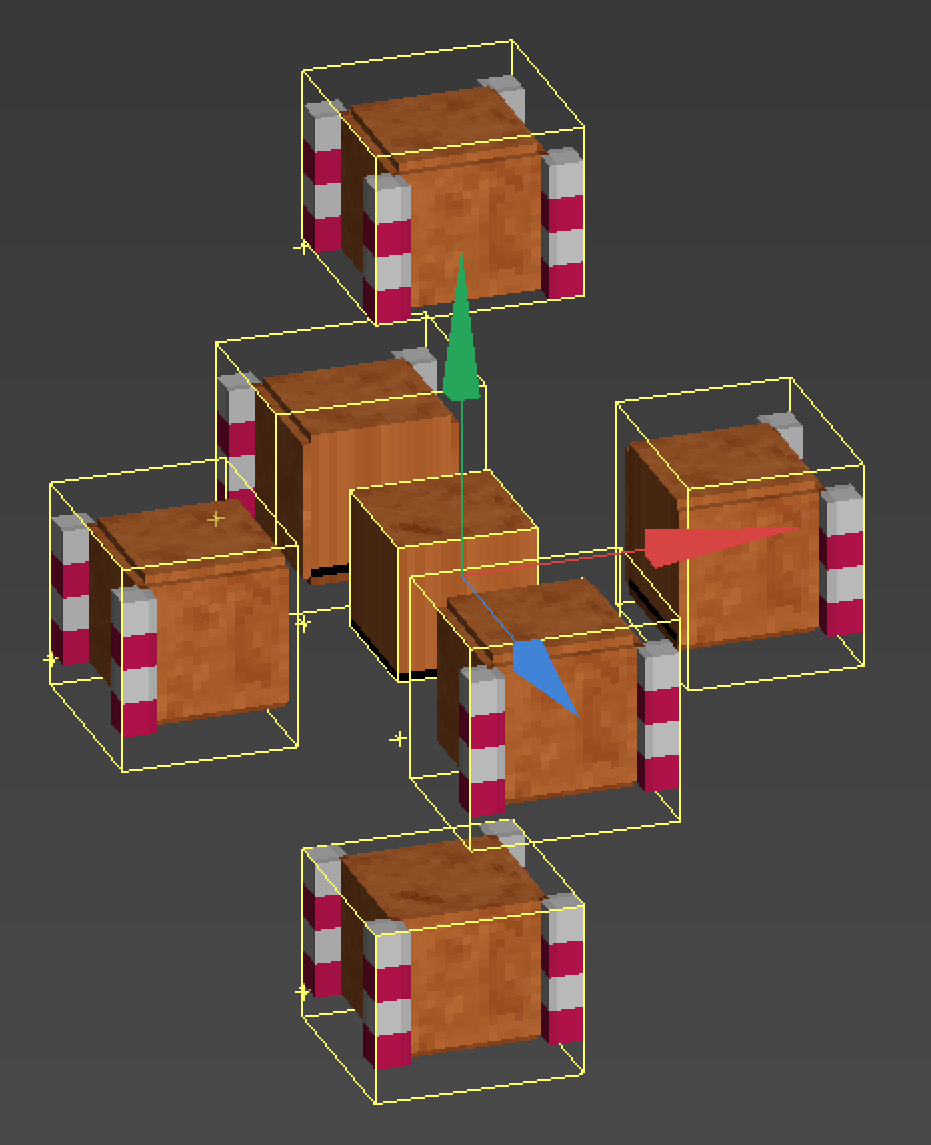
Just use the content builder. I beg you. Don't do this manually. Use the content builder and then edit the result by hand. This is super tedious. You really want to try? Ok. Let's make the Star. You'll want to take your blocks and arrange them into the general shape of the bit you're working on. Then trim the matrices so that you cut off any face that won't be seen.
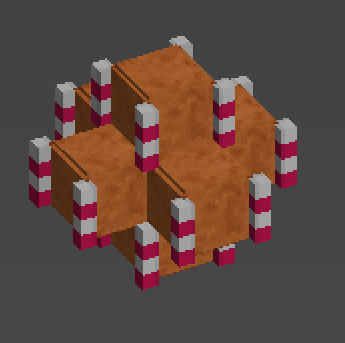
Now stick them together and make a union out of them.
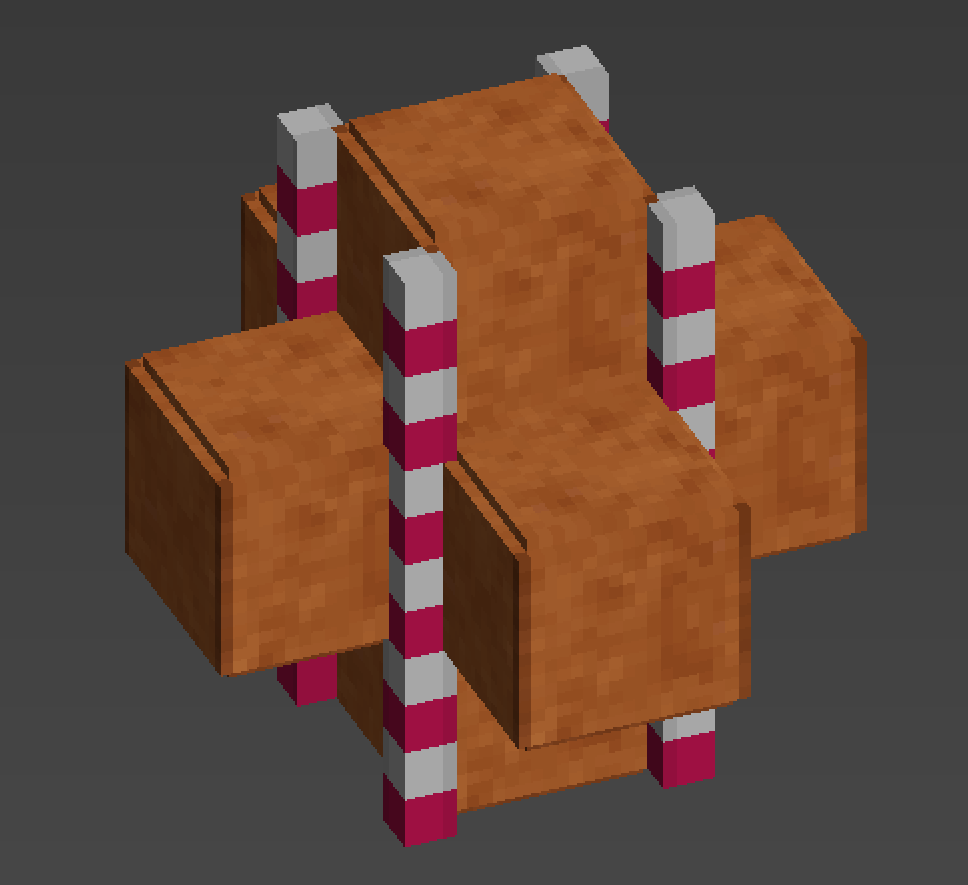
In a ton of cases you're going to be done right now. If you just have solid square blocks this might be all you need. But I've got those weird candycanes and they take extra consideration. You have to decide what bits don't look nice and don't work the way you want your block to work. This is why it's really important to choose a good block template for yourself. Referencing how the dungeon block works in vanilla, I know that if I make my candycanes the same shape and placement as the vanilla dungeon block then my block will work properly, even if bits of it seem really strange to me. So I reference the dungeon tile and realize that the outer candycanes aren't important here, it's just those inner corners this bit cares about. I do a little editing to fill in bits that are missing and take out parts I don't need and call this chunk done.
Once you've got all 9 chunks done, line them up according to your guide skeleton, merge them all together and resize the bounding box to the skeleton's size. Make sure everything lines up with the core placements and make adjustments if you messed up. It's a right royal pain. Notice that if I hadn't trimmed my core block in the middle I wouldn't have had to replace those bits of candy cane. But it can be hard to know what to keep and what to toss until you really have the concept of how this works in your head.
